
Create Your First Process
This chapter walks you through the complete process from logging in to creating a simple workflow.
1. Log In
Open a browser and visit the workflow system:
| Deployment | URL |
|---|---|
| Local | http://localhost:8080/horizon-workflow-boot |
| Online | http://219.141.180.186:9003/workflow82 |
Default credentials:
- Username: admin
- Password: 1234
2. Open Process Design
After logging in, click Process Modeling in the menu to open the process design page.
Follow the steps below, or watch the video:
Workflow Engine Overview (5-Minute Video)3. Create a New Process
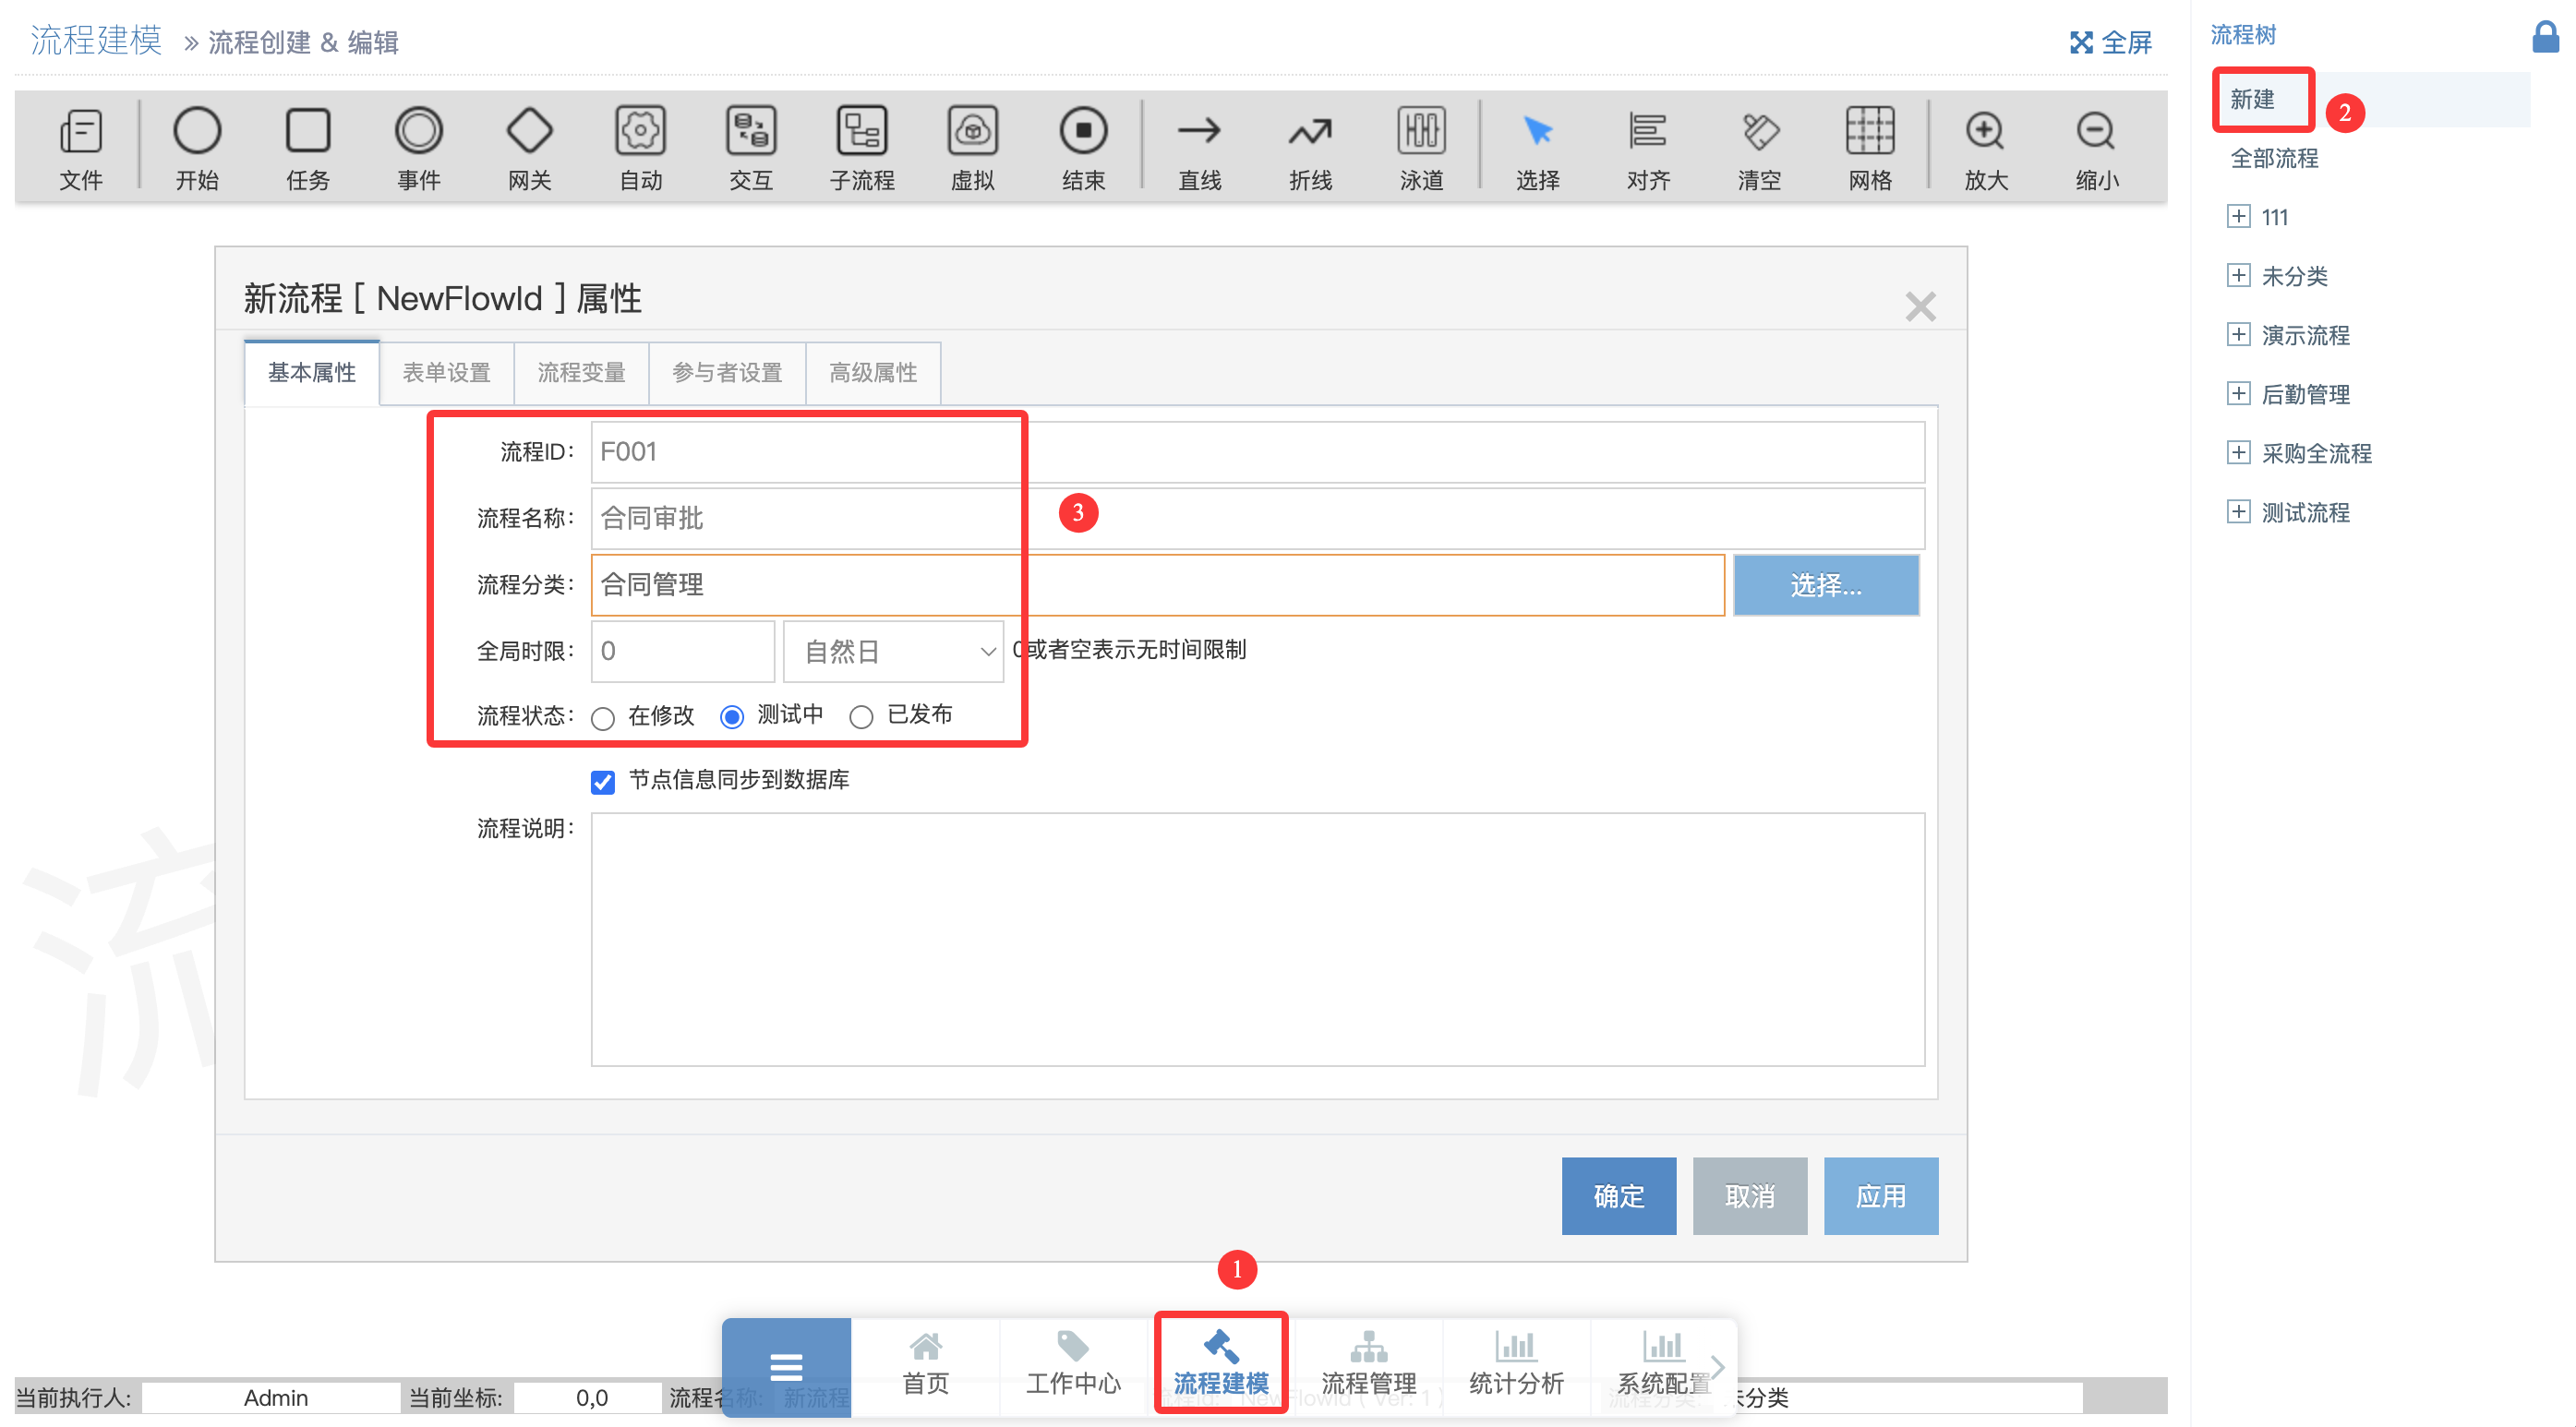
On the process design page, click New to create your first process.
Process information:
- Process ID: Custom; must start with a letter; letters and numbers allowed
- Process Name: Custom
- Process Category: Type a new category or select one from the list
- Process Status: Set to Testing
Click OK to enter the canvas.
4. Design the Process
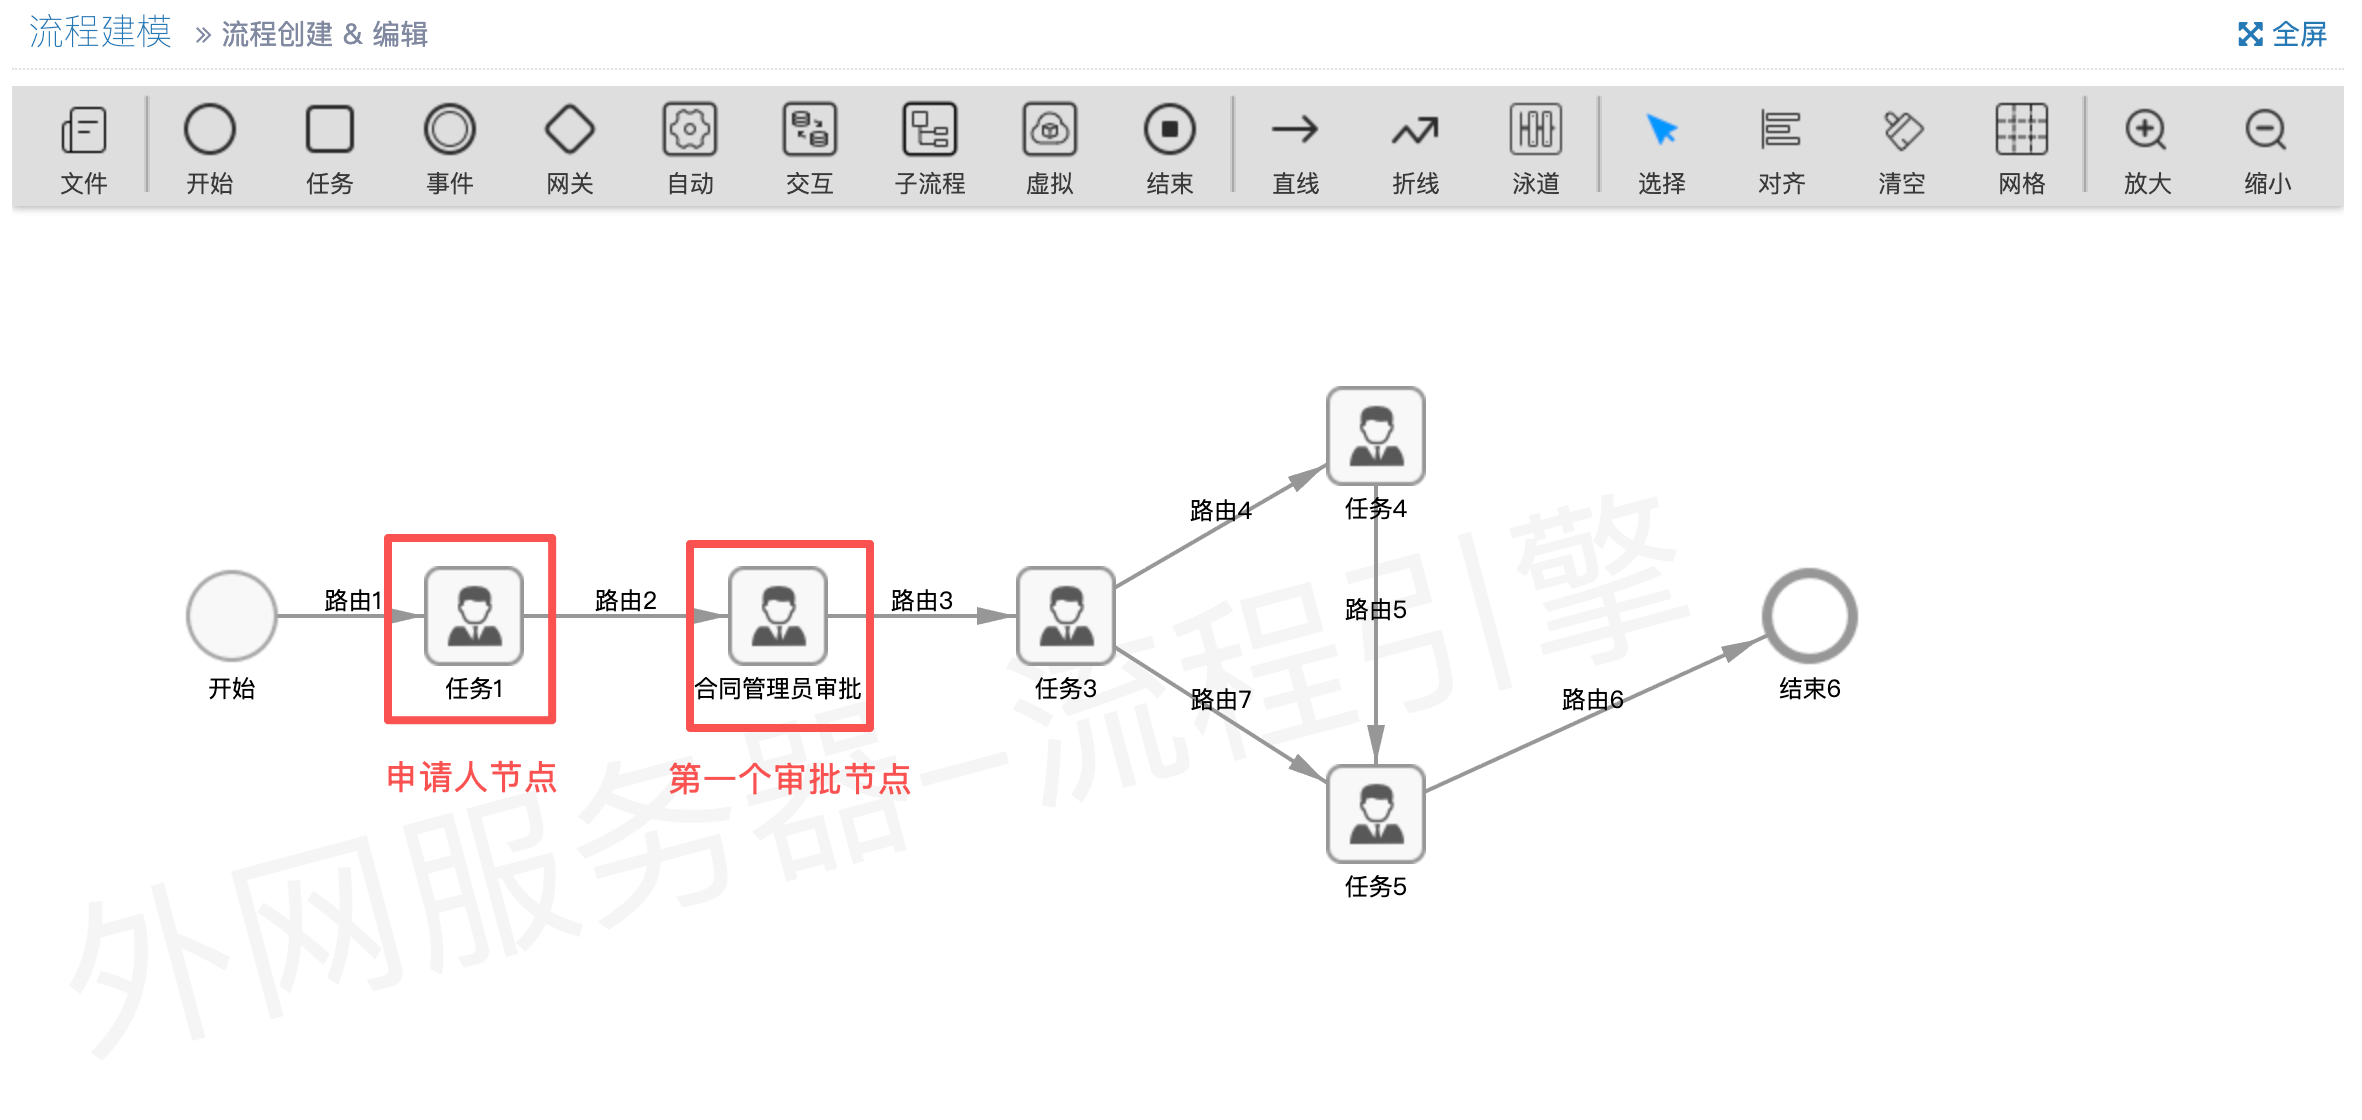
Drag nodes from the node panel onto the canvas, configure node properties, and connect nodes to form the complete process logic.
Note
The application node does not require an assignee; it defaults to the current operator.
Configure the first approval node:
1. Change the Node Name
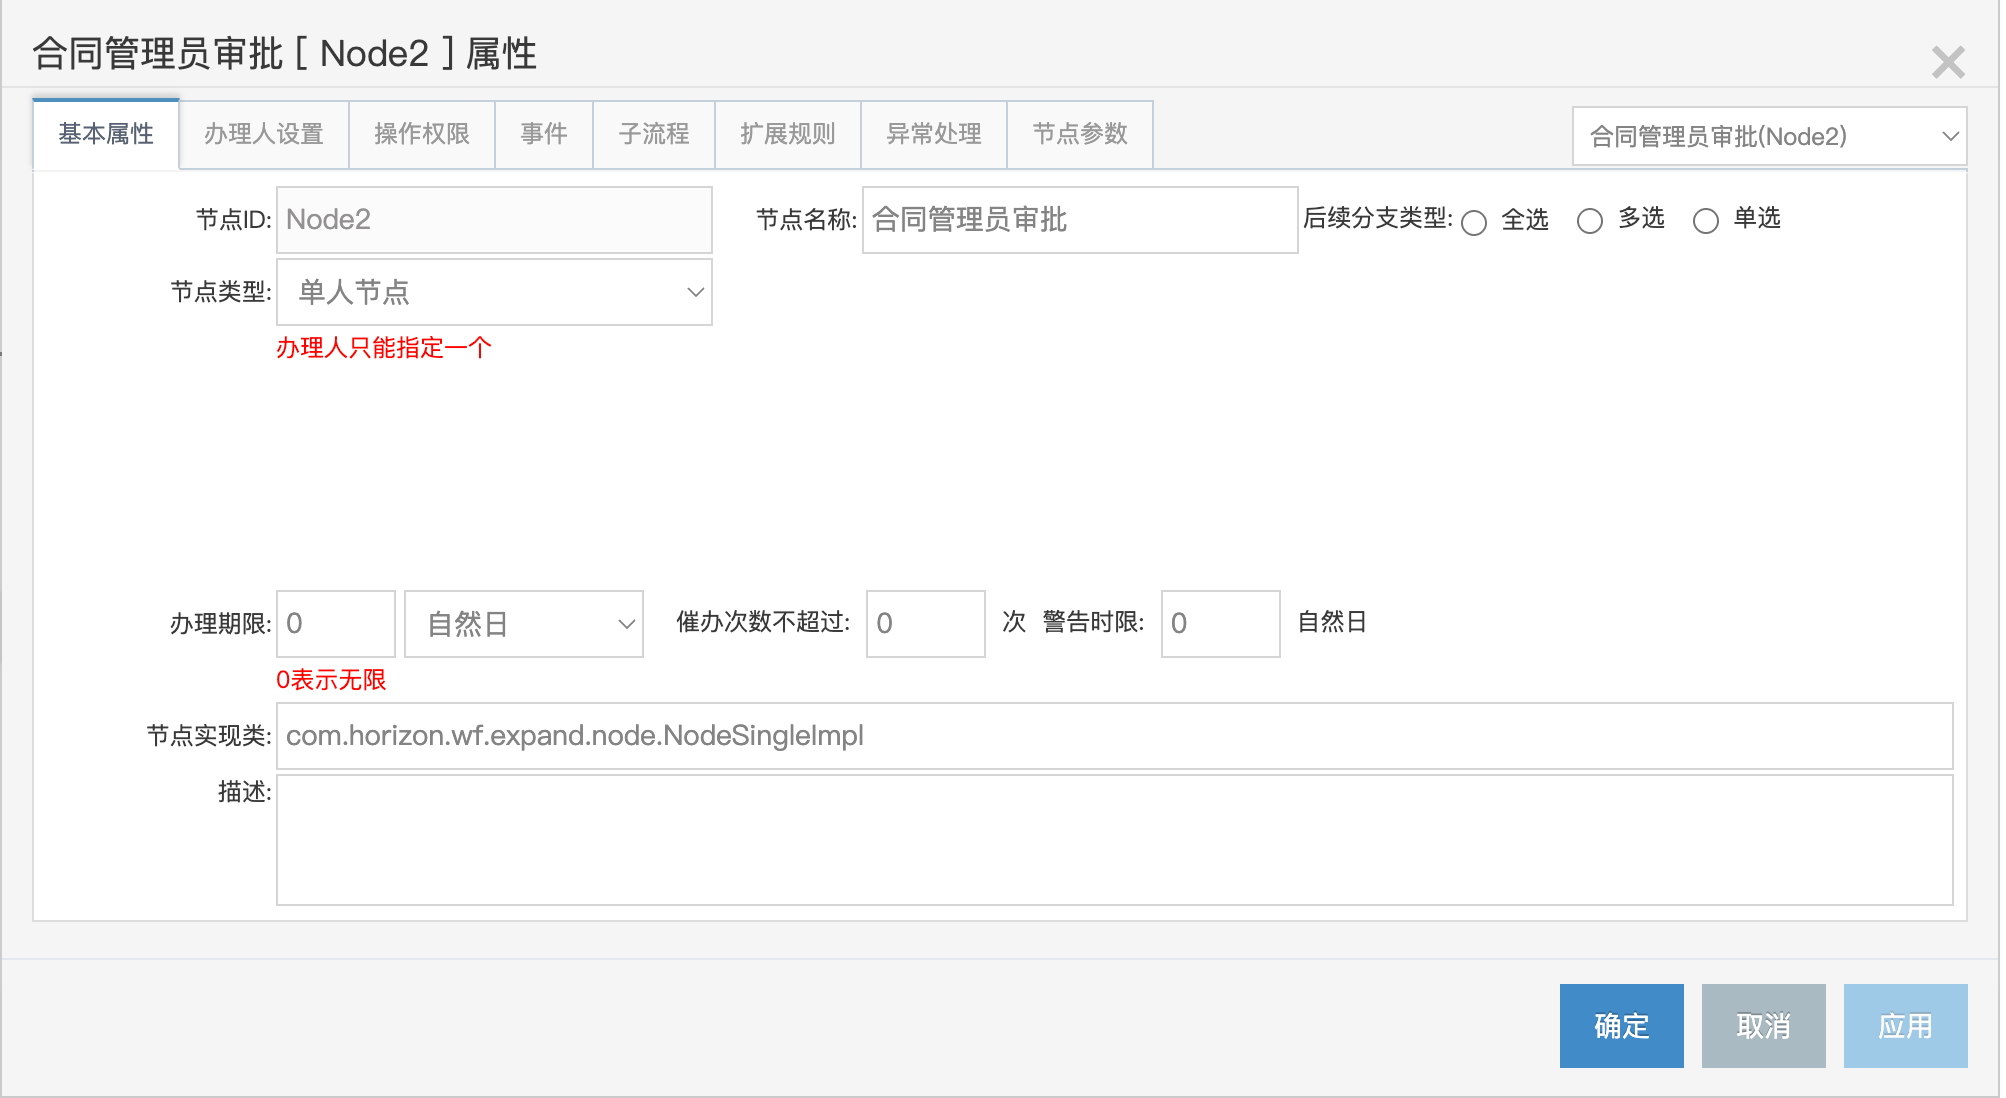
For node property details, see Task Node.
2. Set Assignees
Option 1: Select fixed assignees from the organization structure 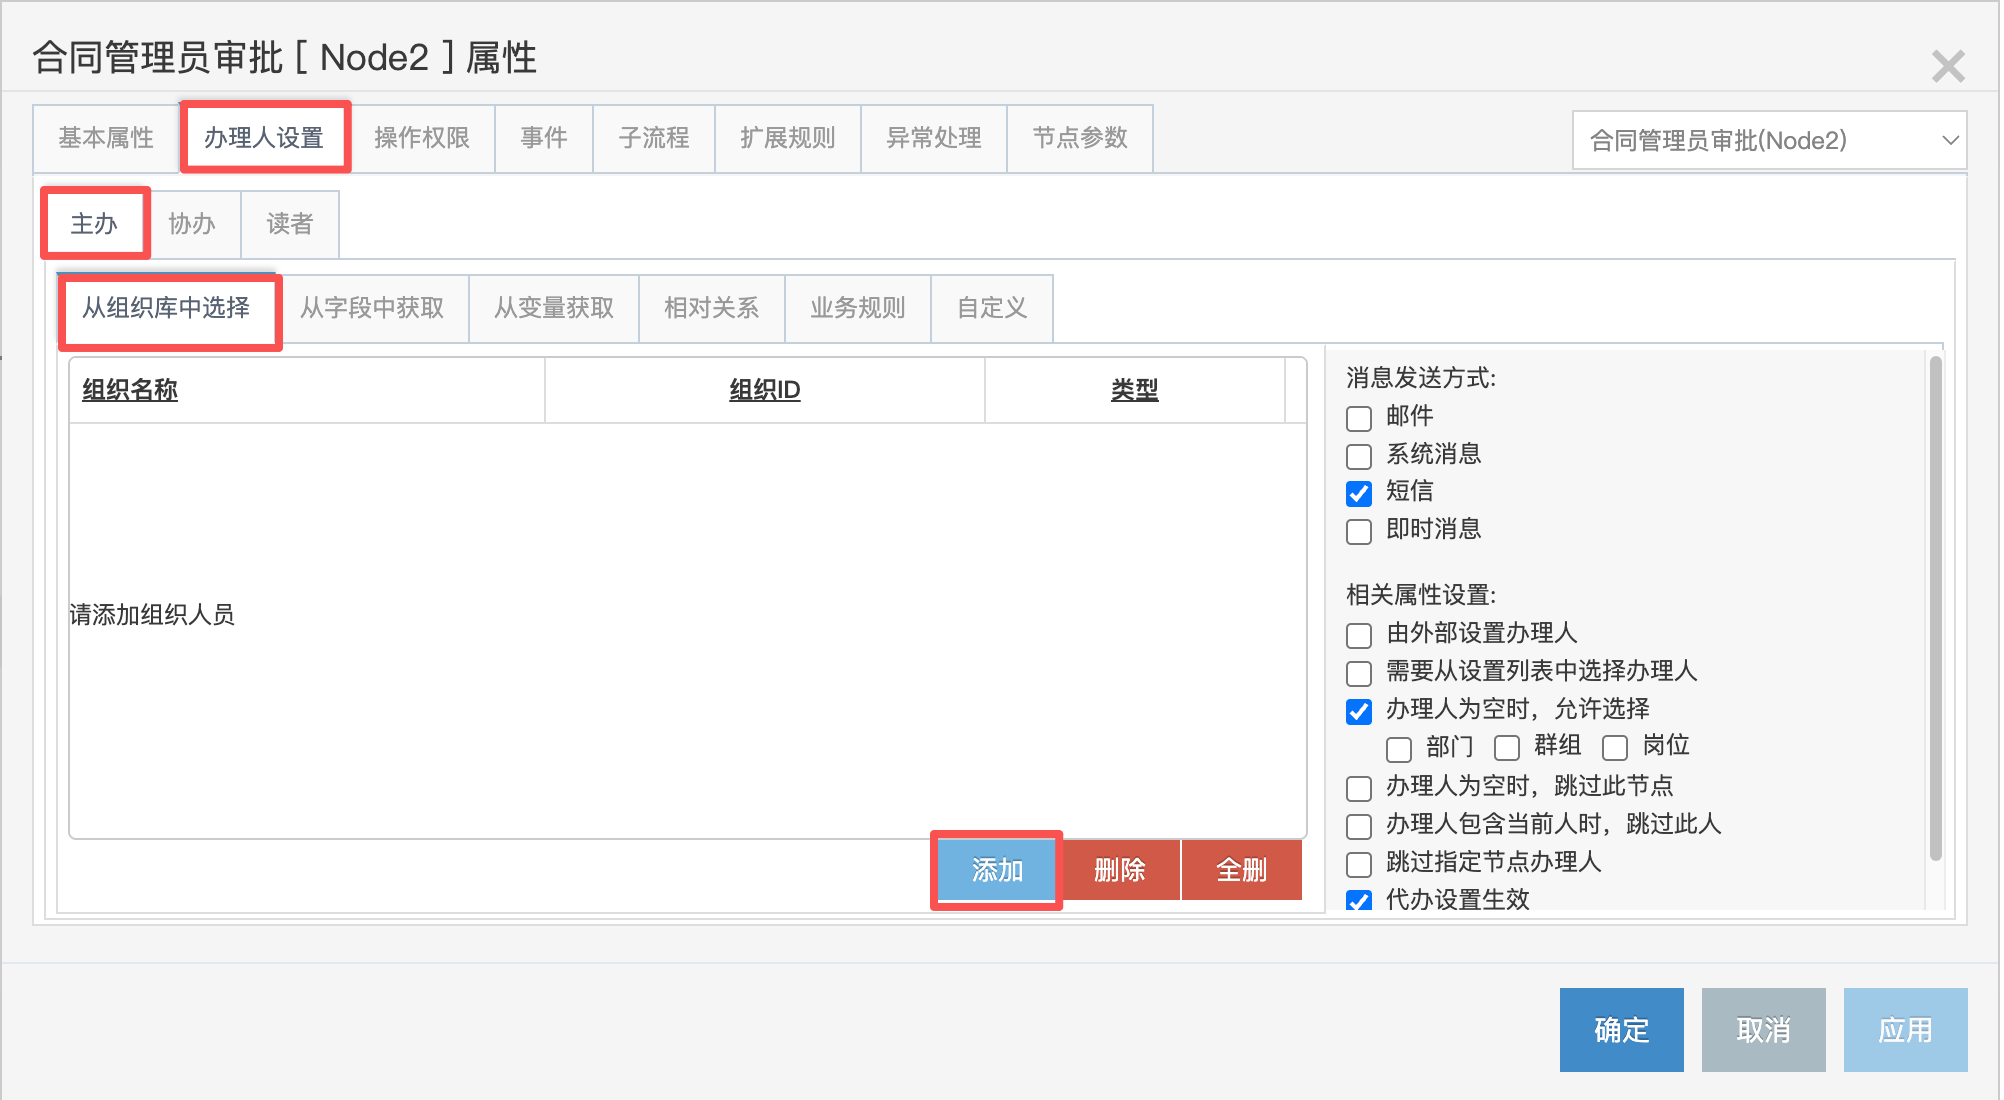
Option 2: Dynamically resolve assignees from relative relationships 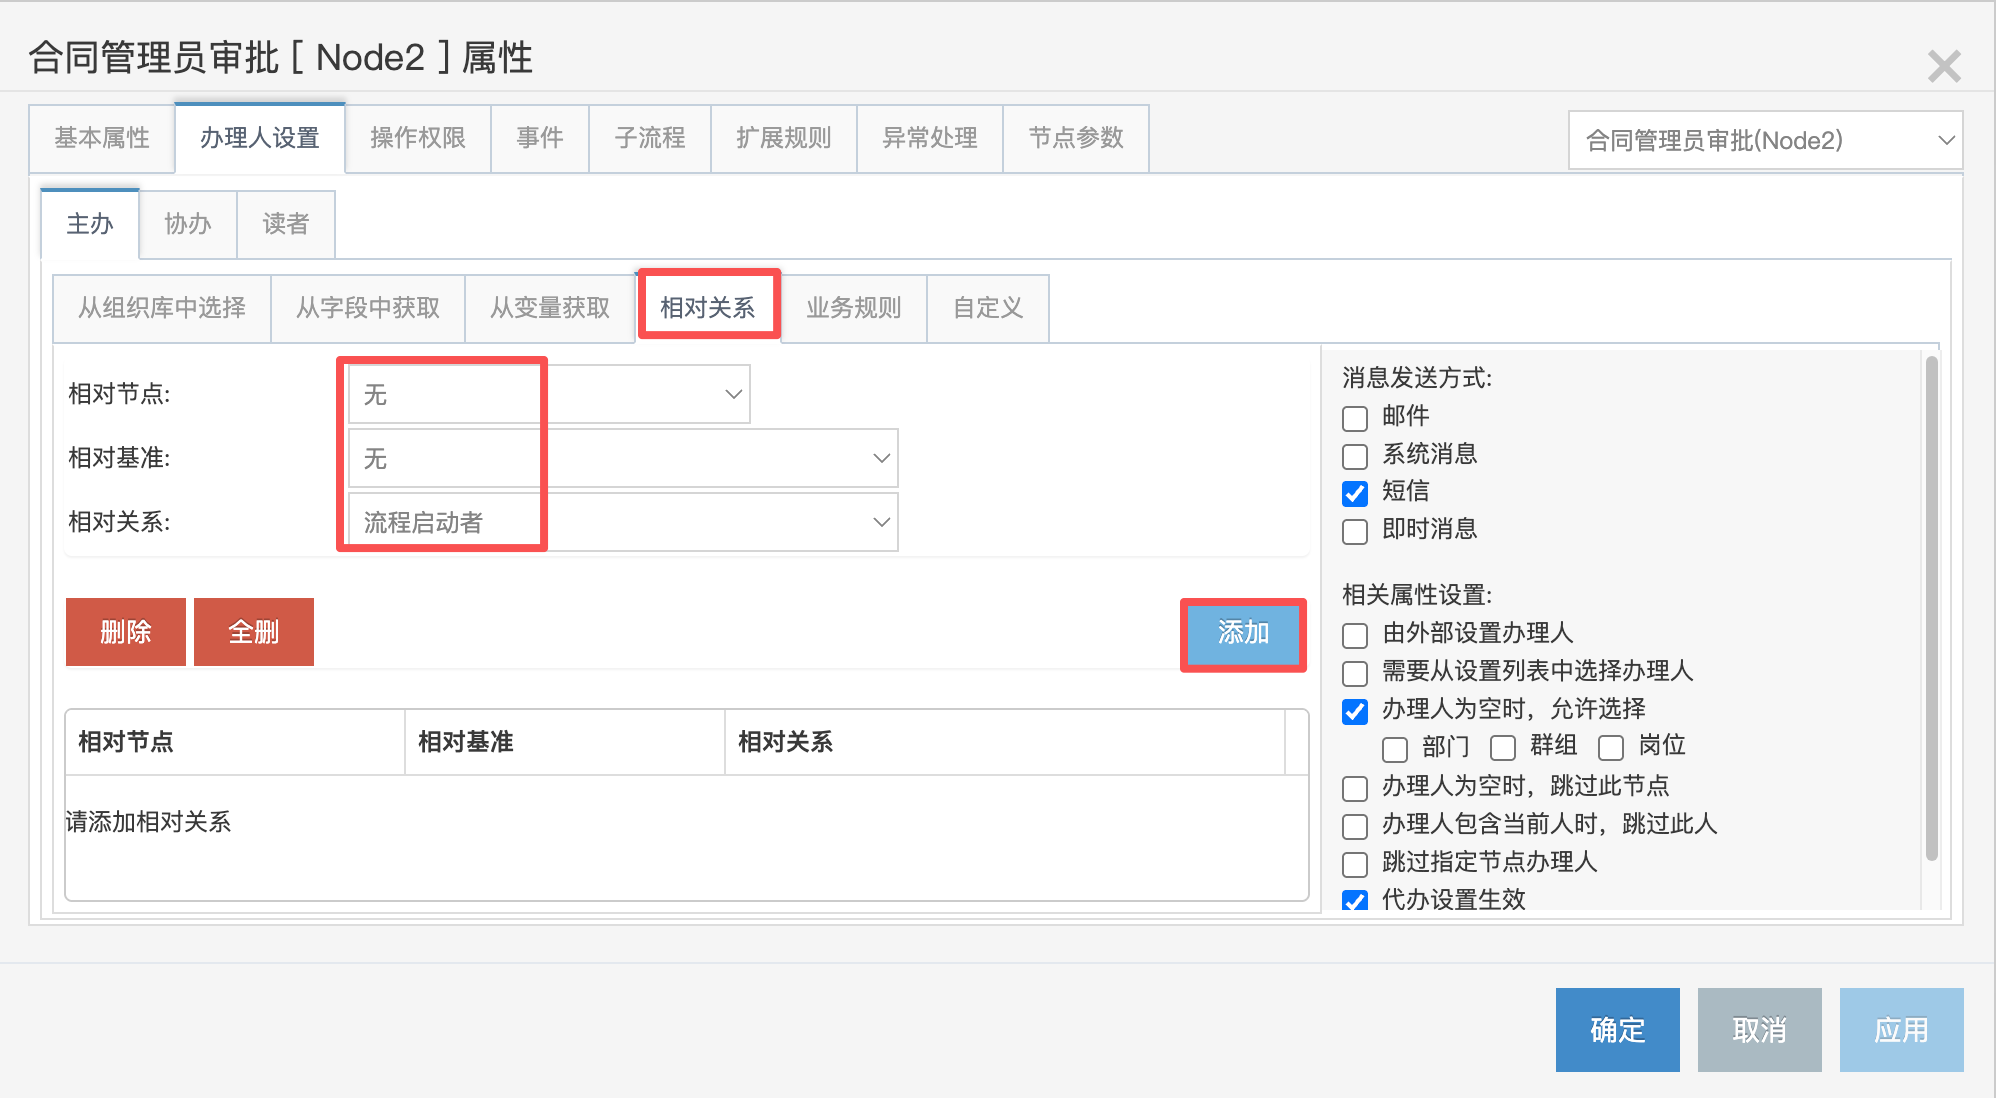
3. Set Operation Permissions
Submit and Save Draft are selected by default; uncheck as needed for your business. 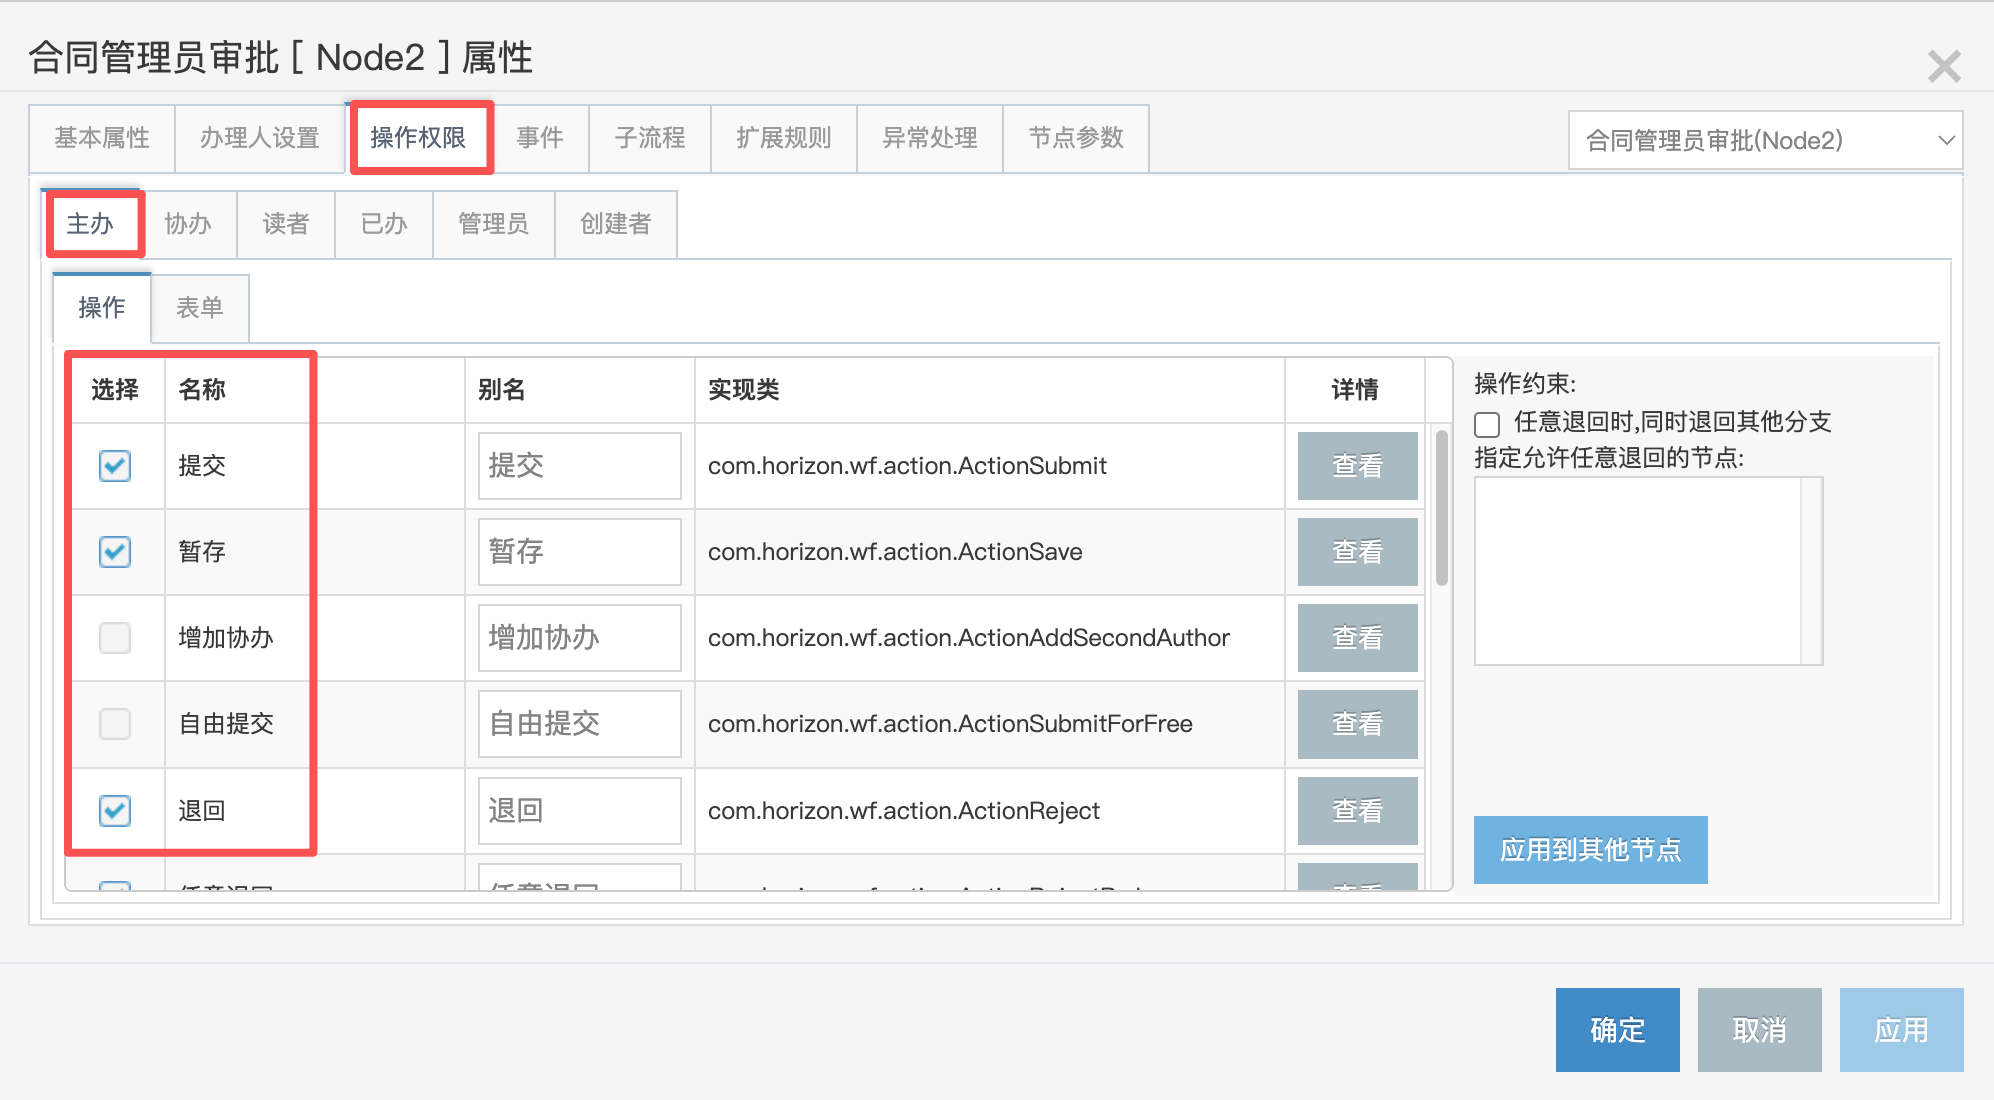
Configure other nodes as needed.
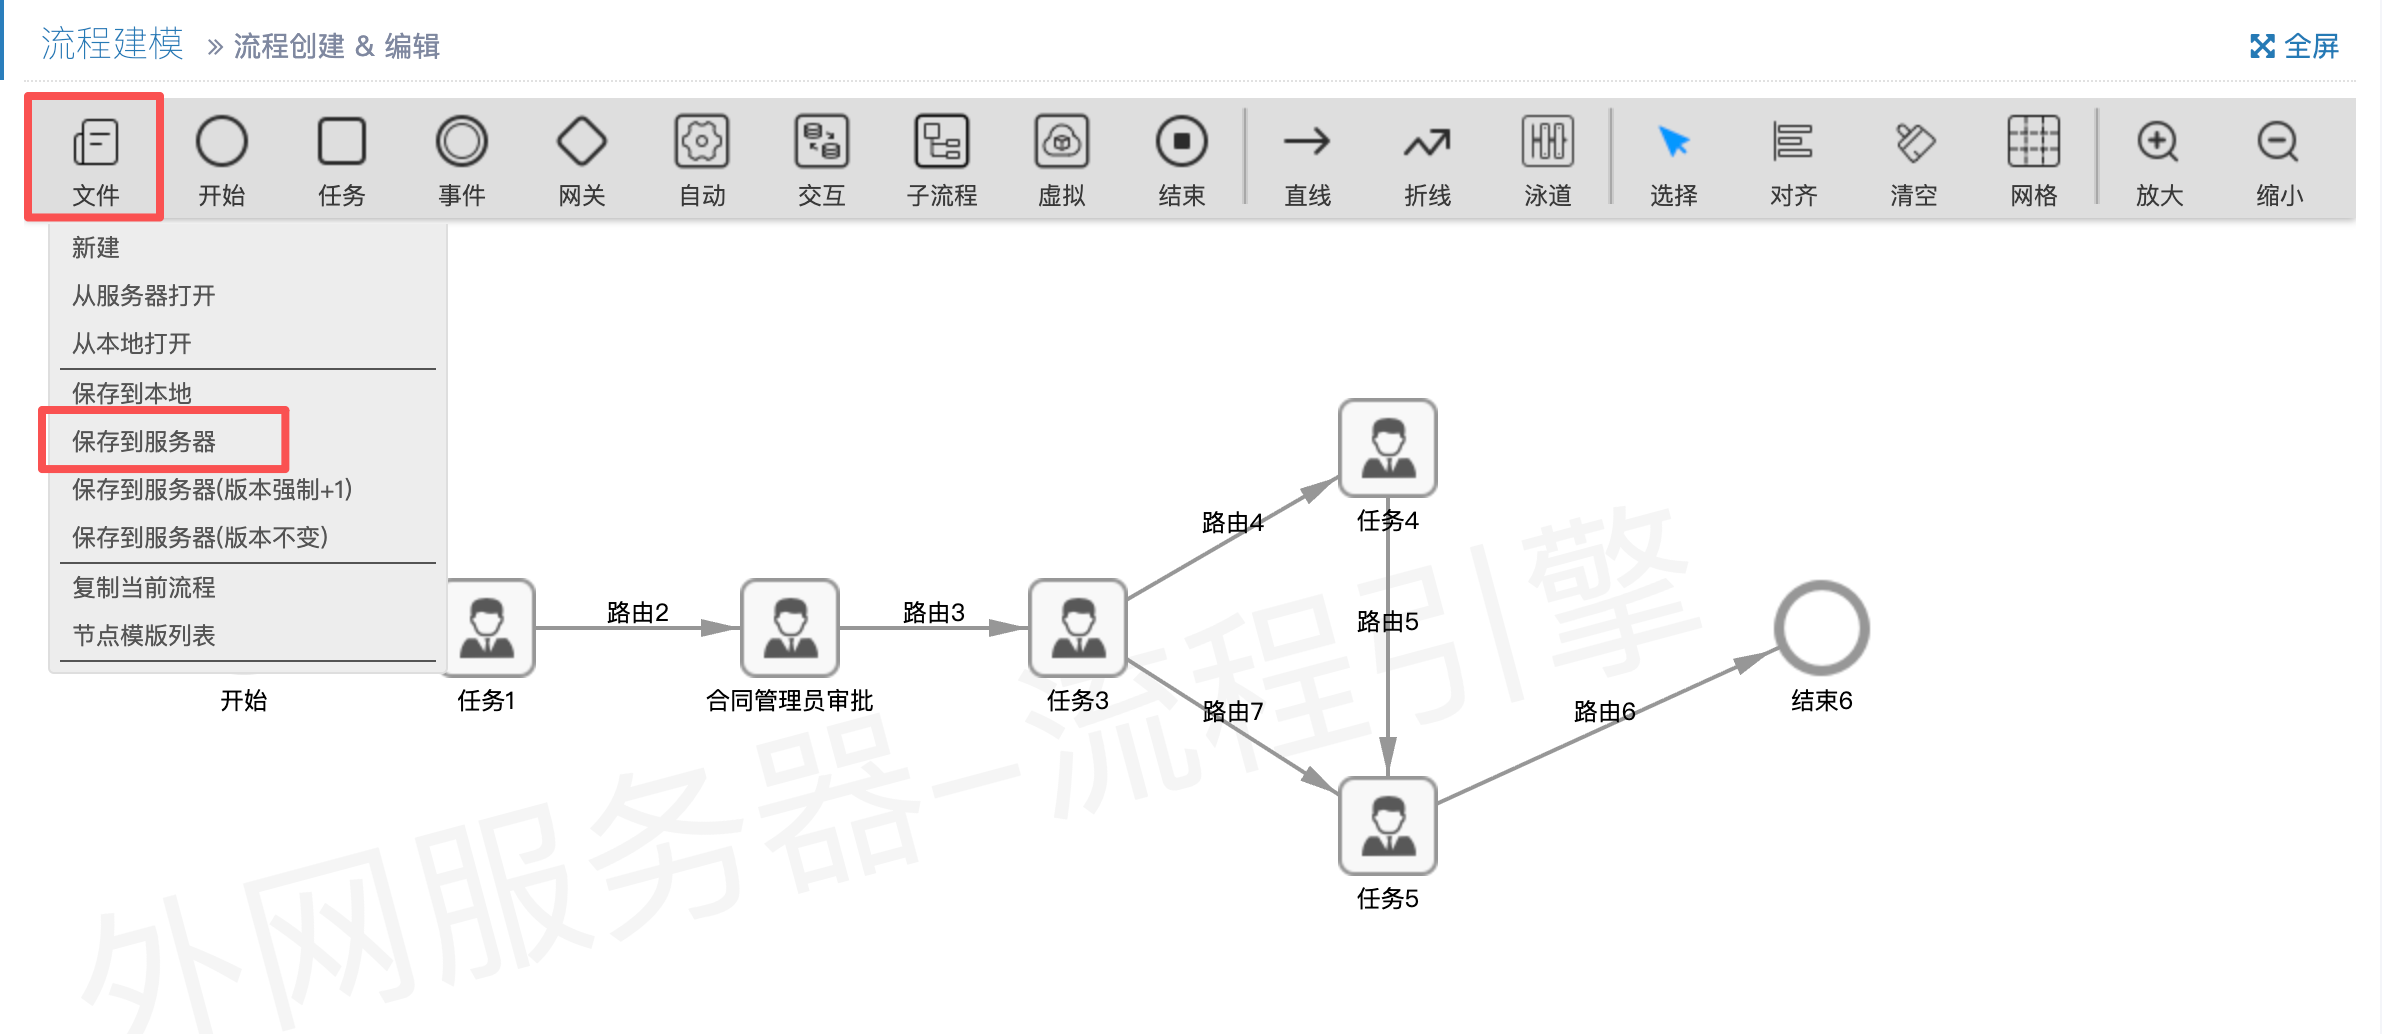
5. Save and Publish
After designing the process, click File → Save to Server to save the process definition.
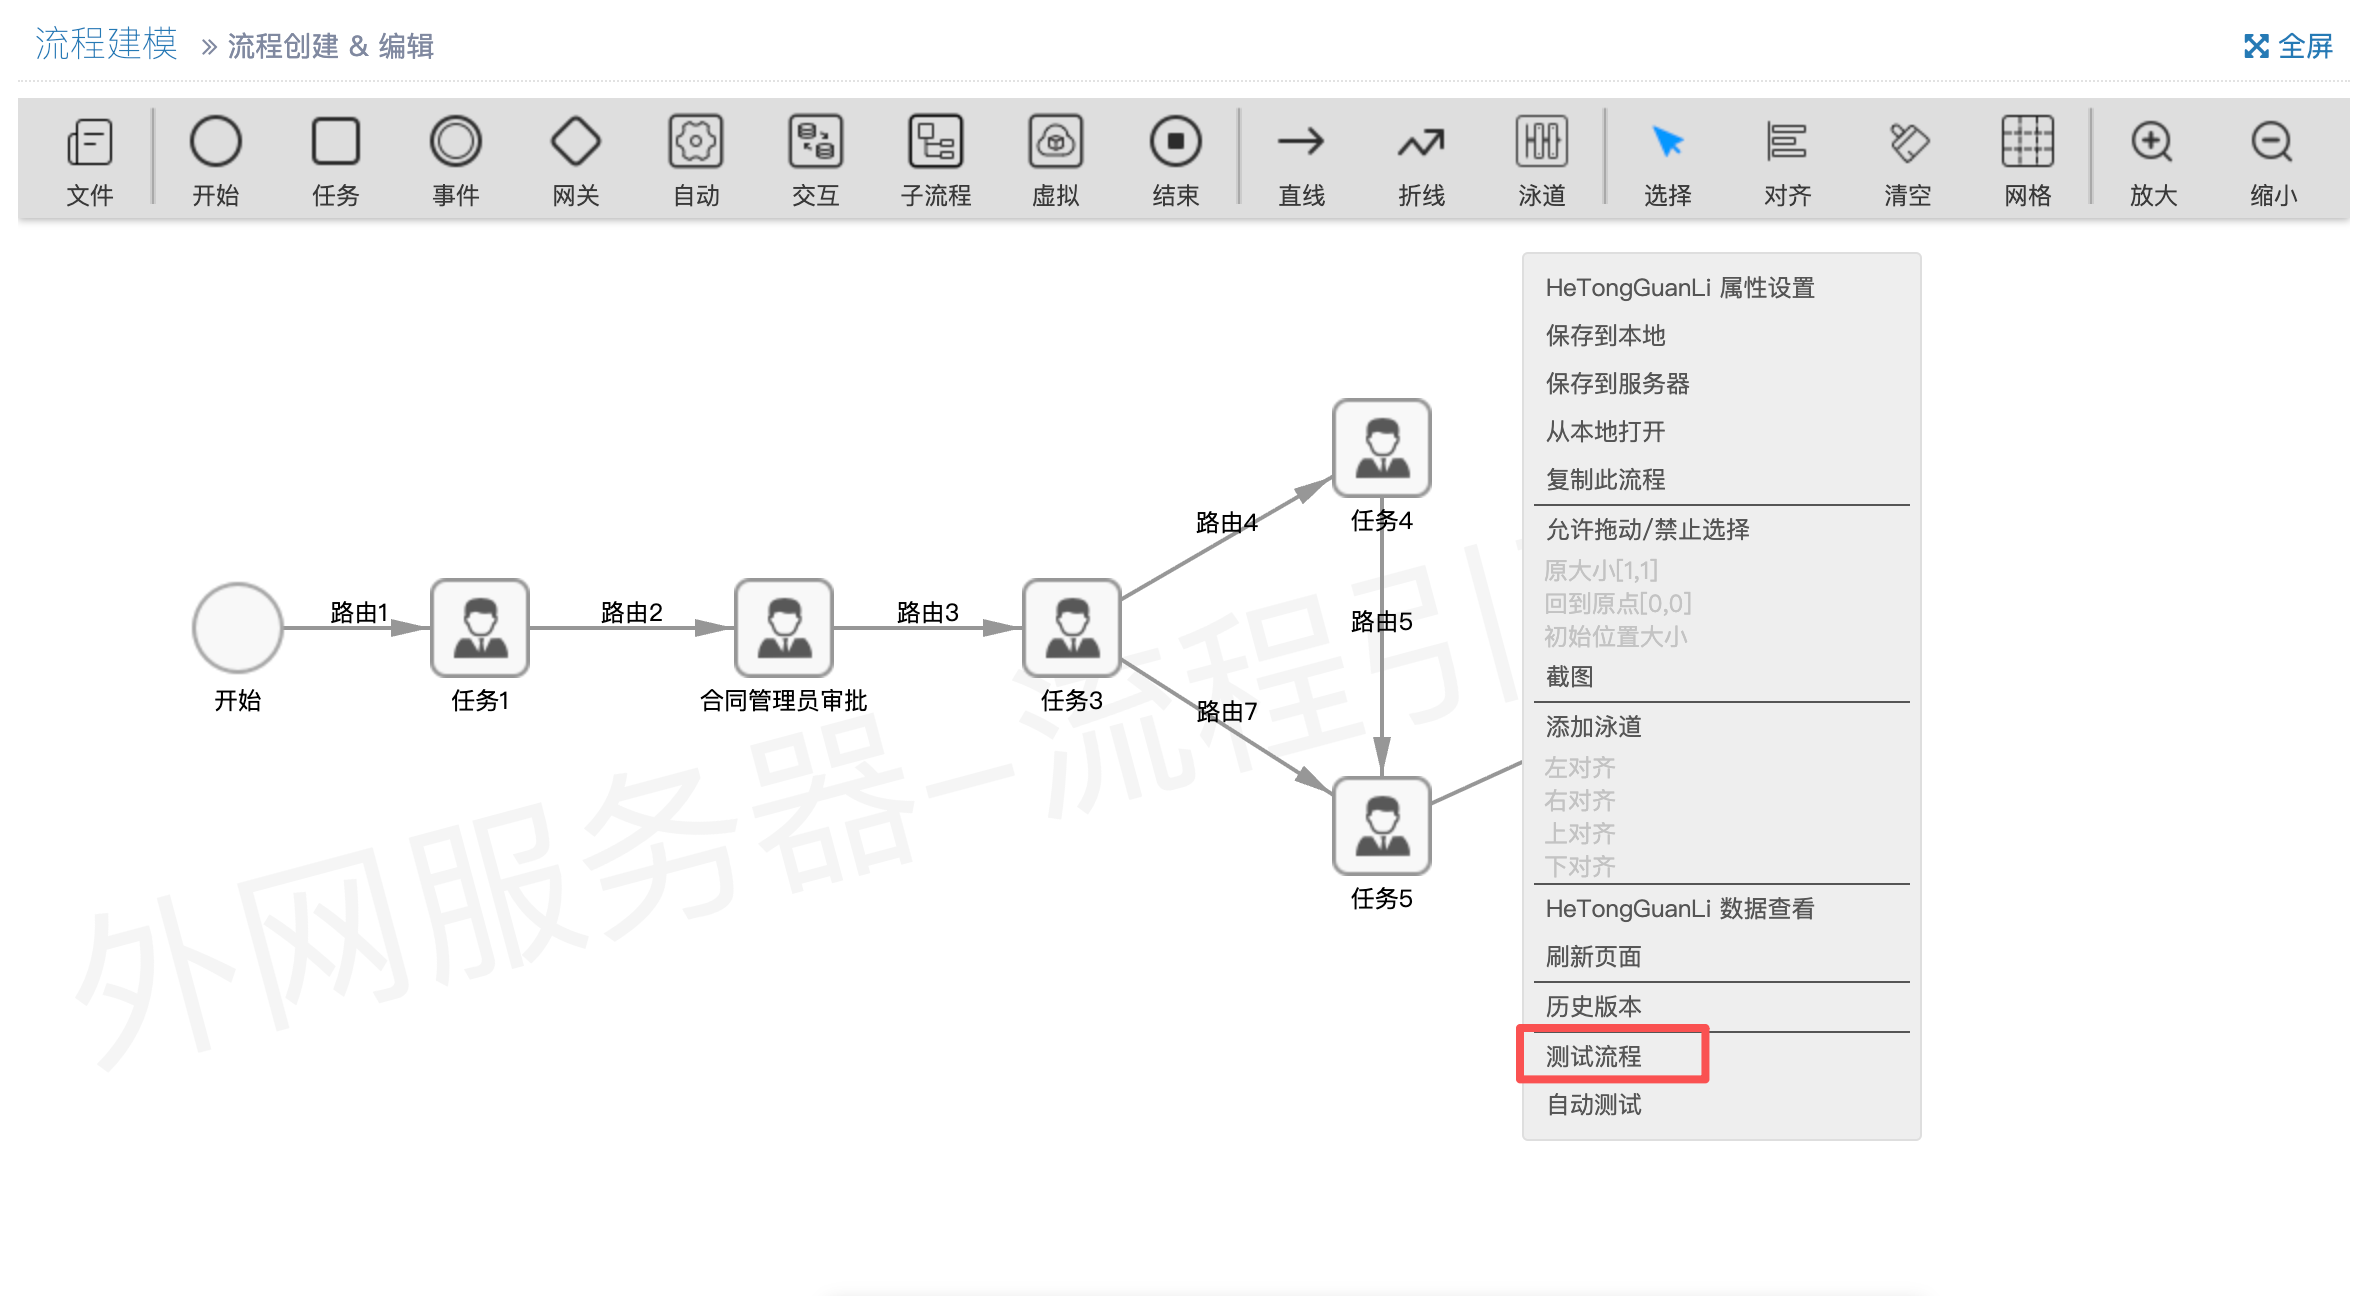
6. Test the Process
Right-click on an empty area of the canvas → Test Process to verify the process runs correctly.
Common test issues:
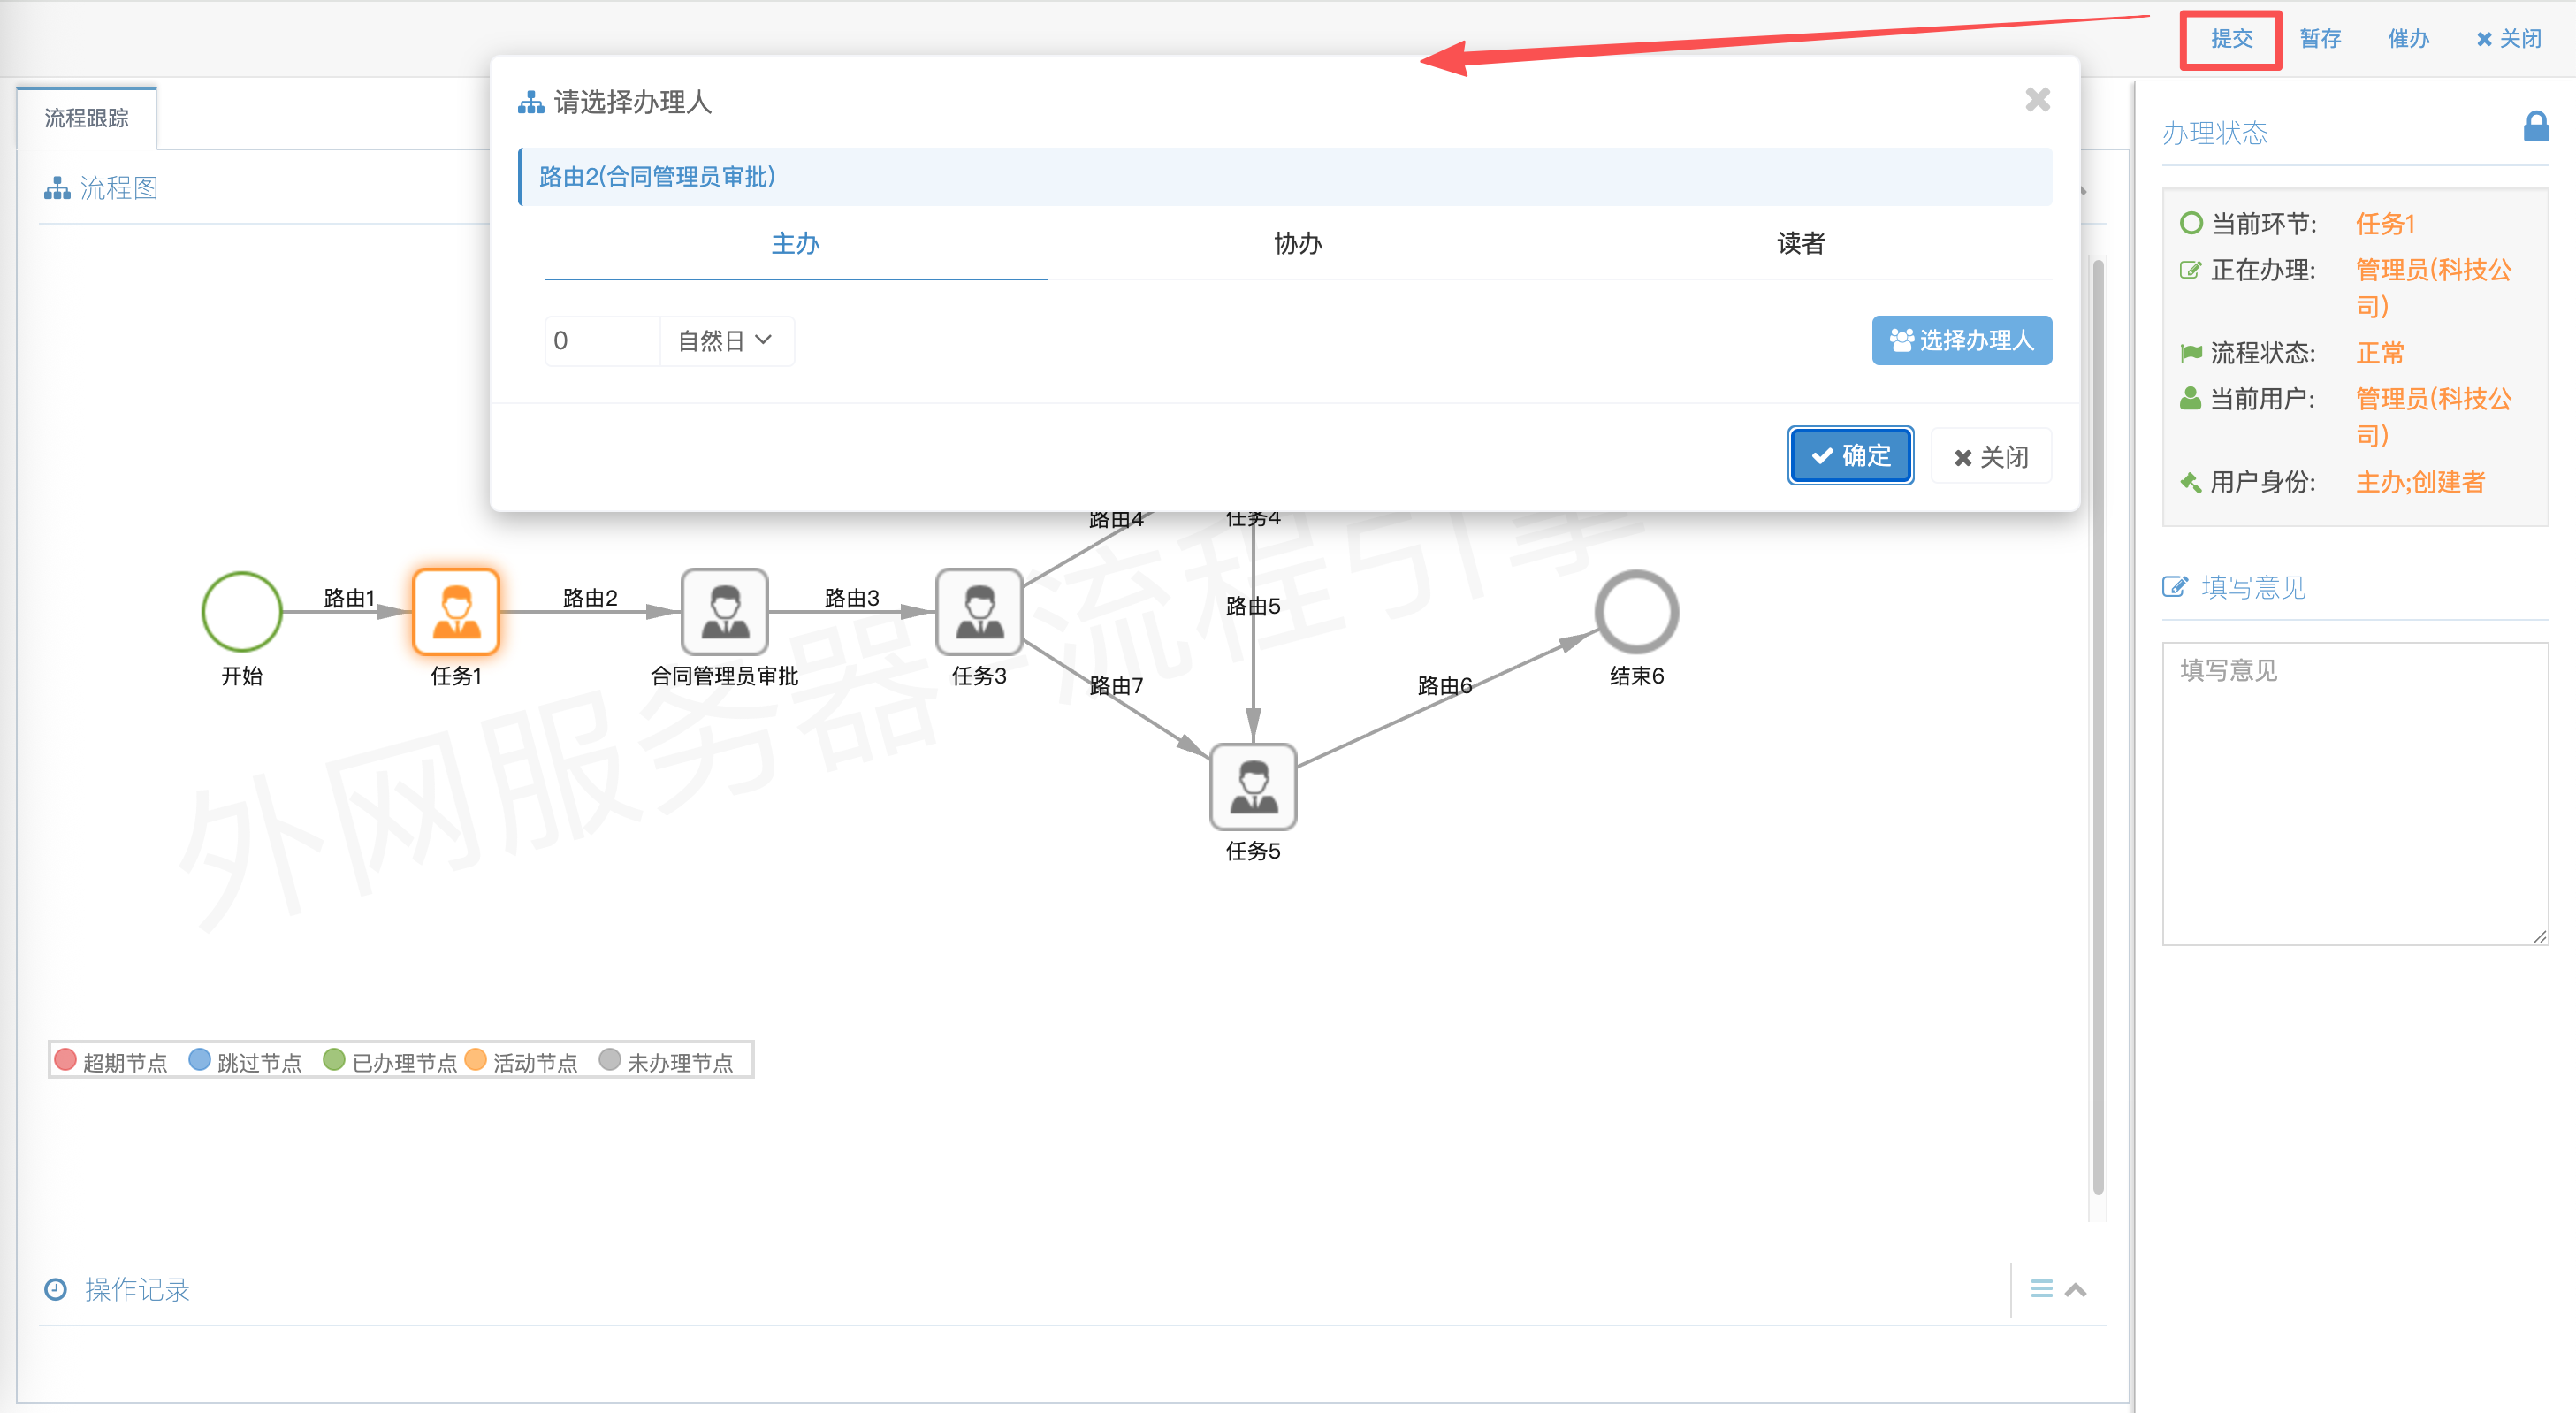
On the process approval page, click Submit:
When the next node has no assignee: Click to select assignees freely
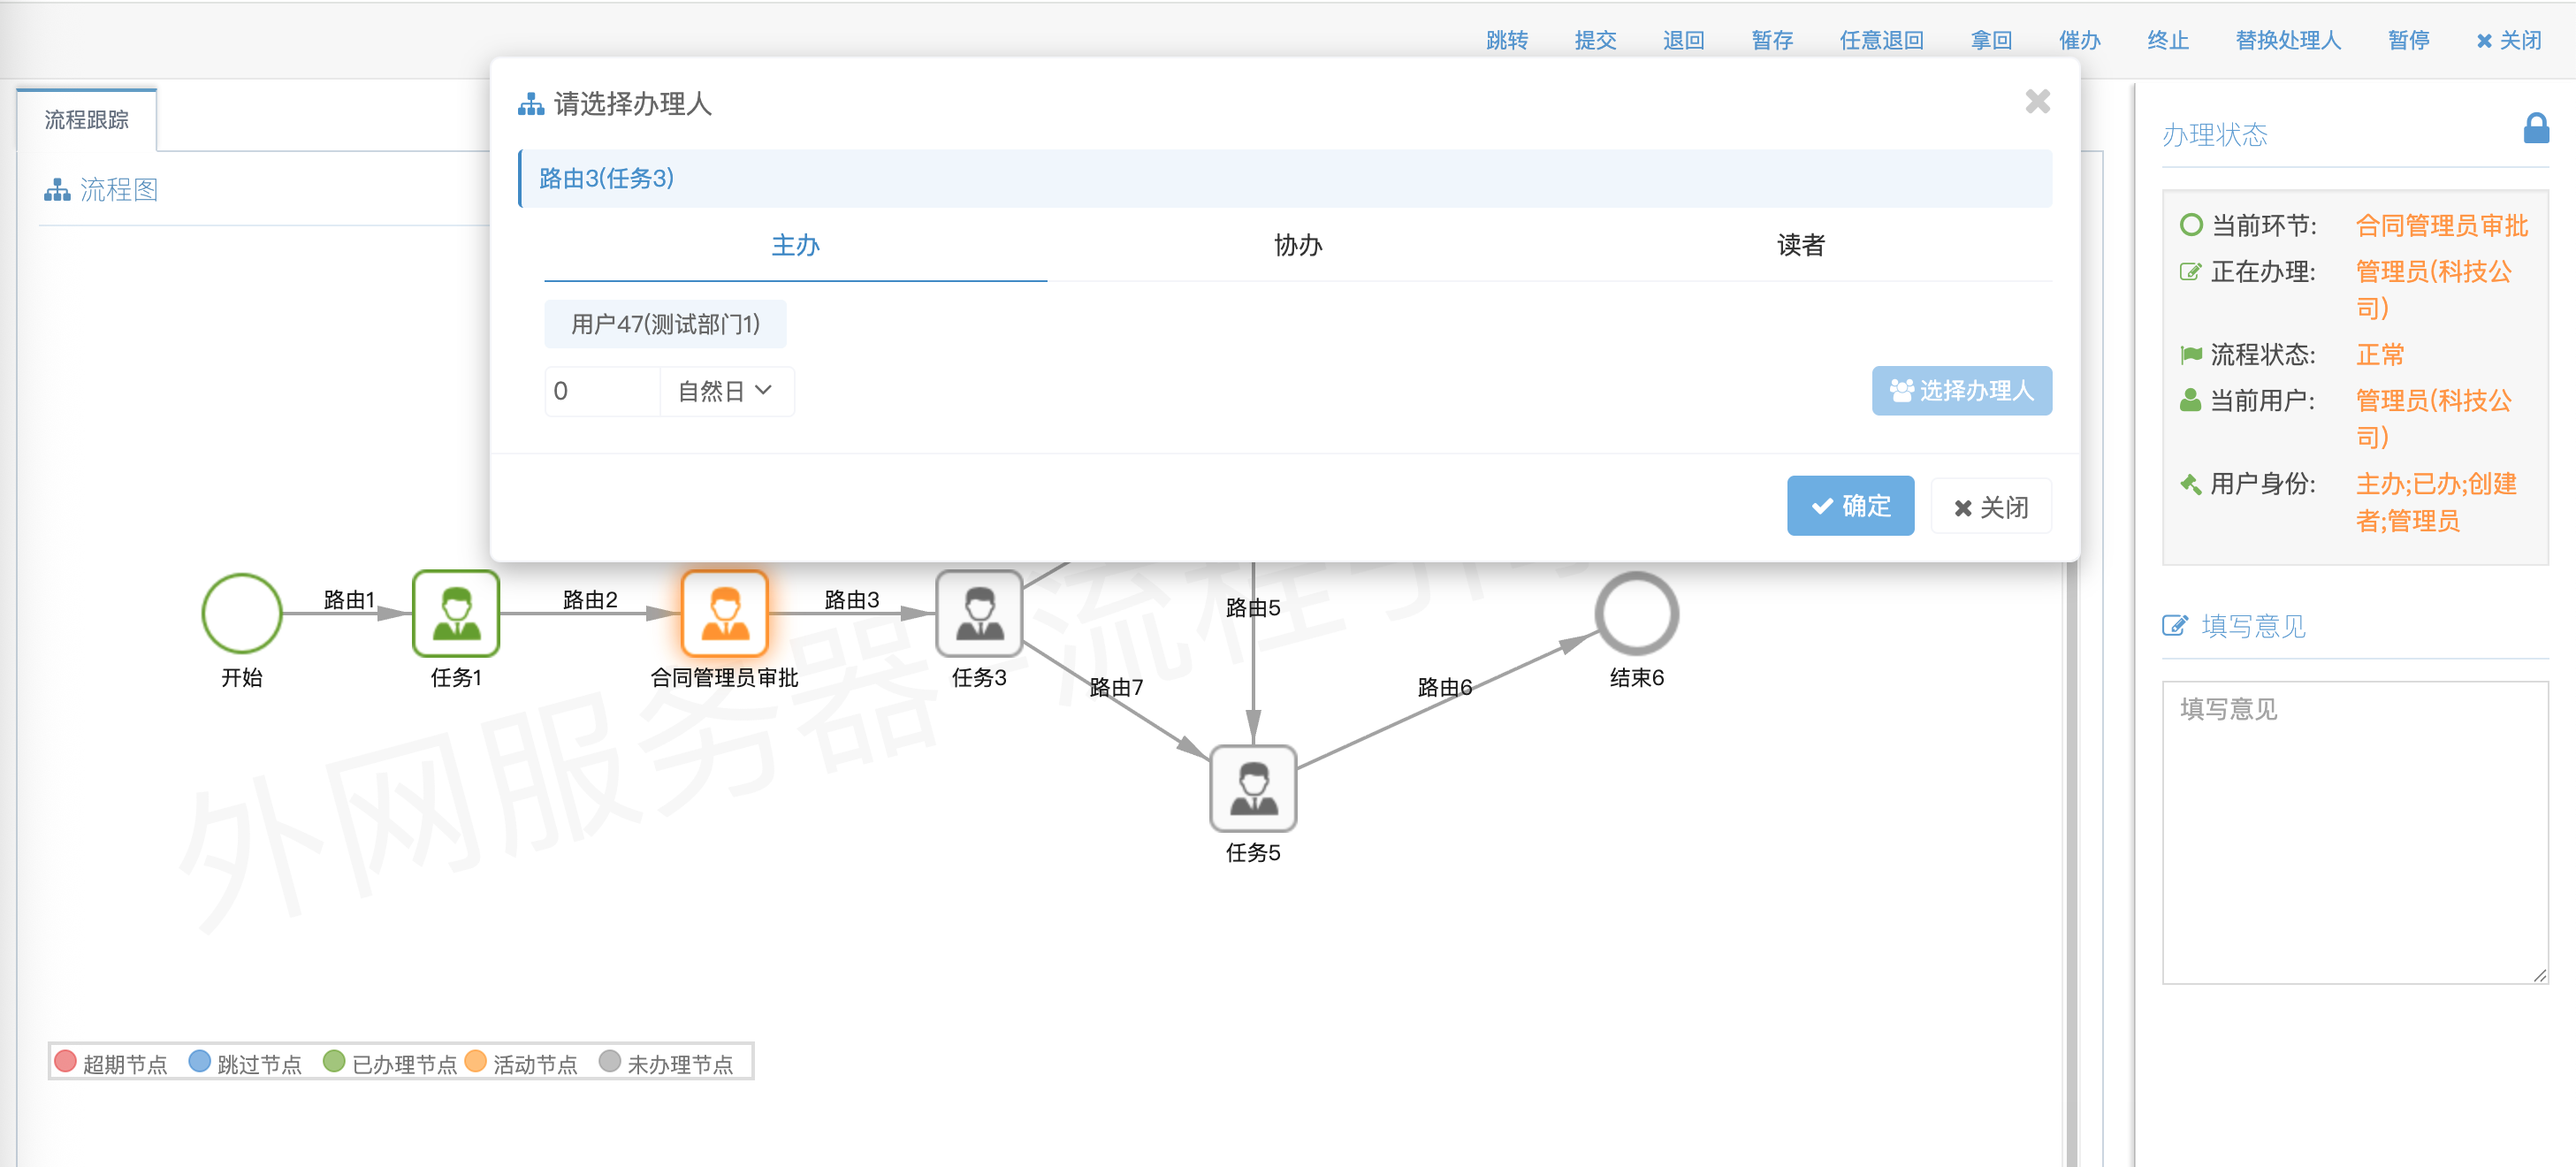
When the node has assignees configured: They load automatically; click OK to submit
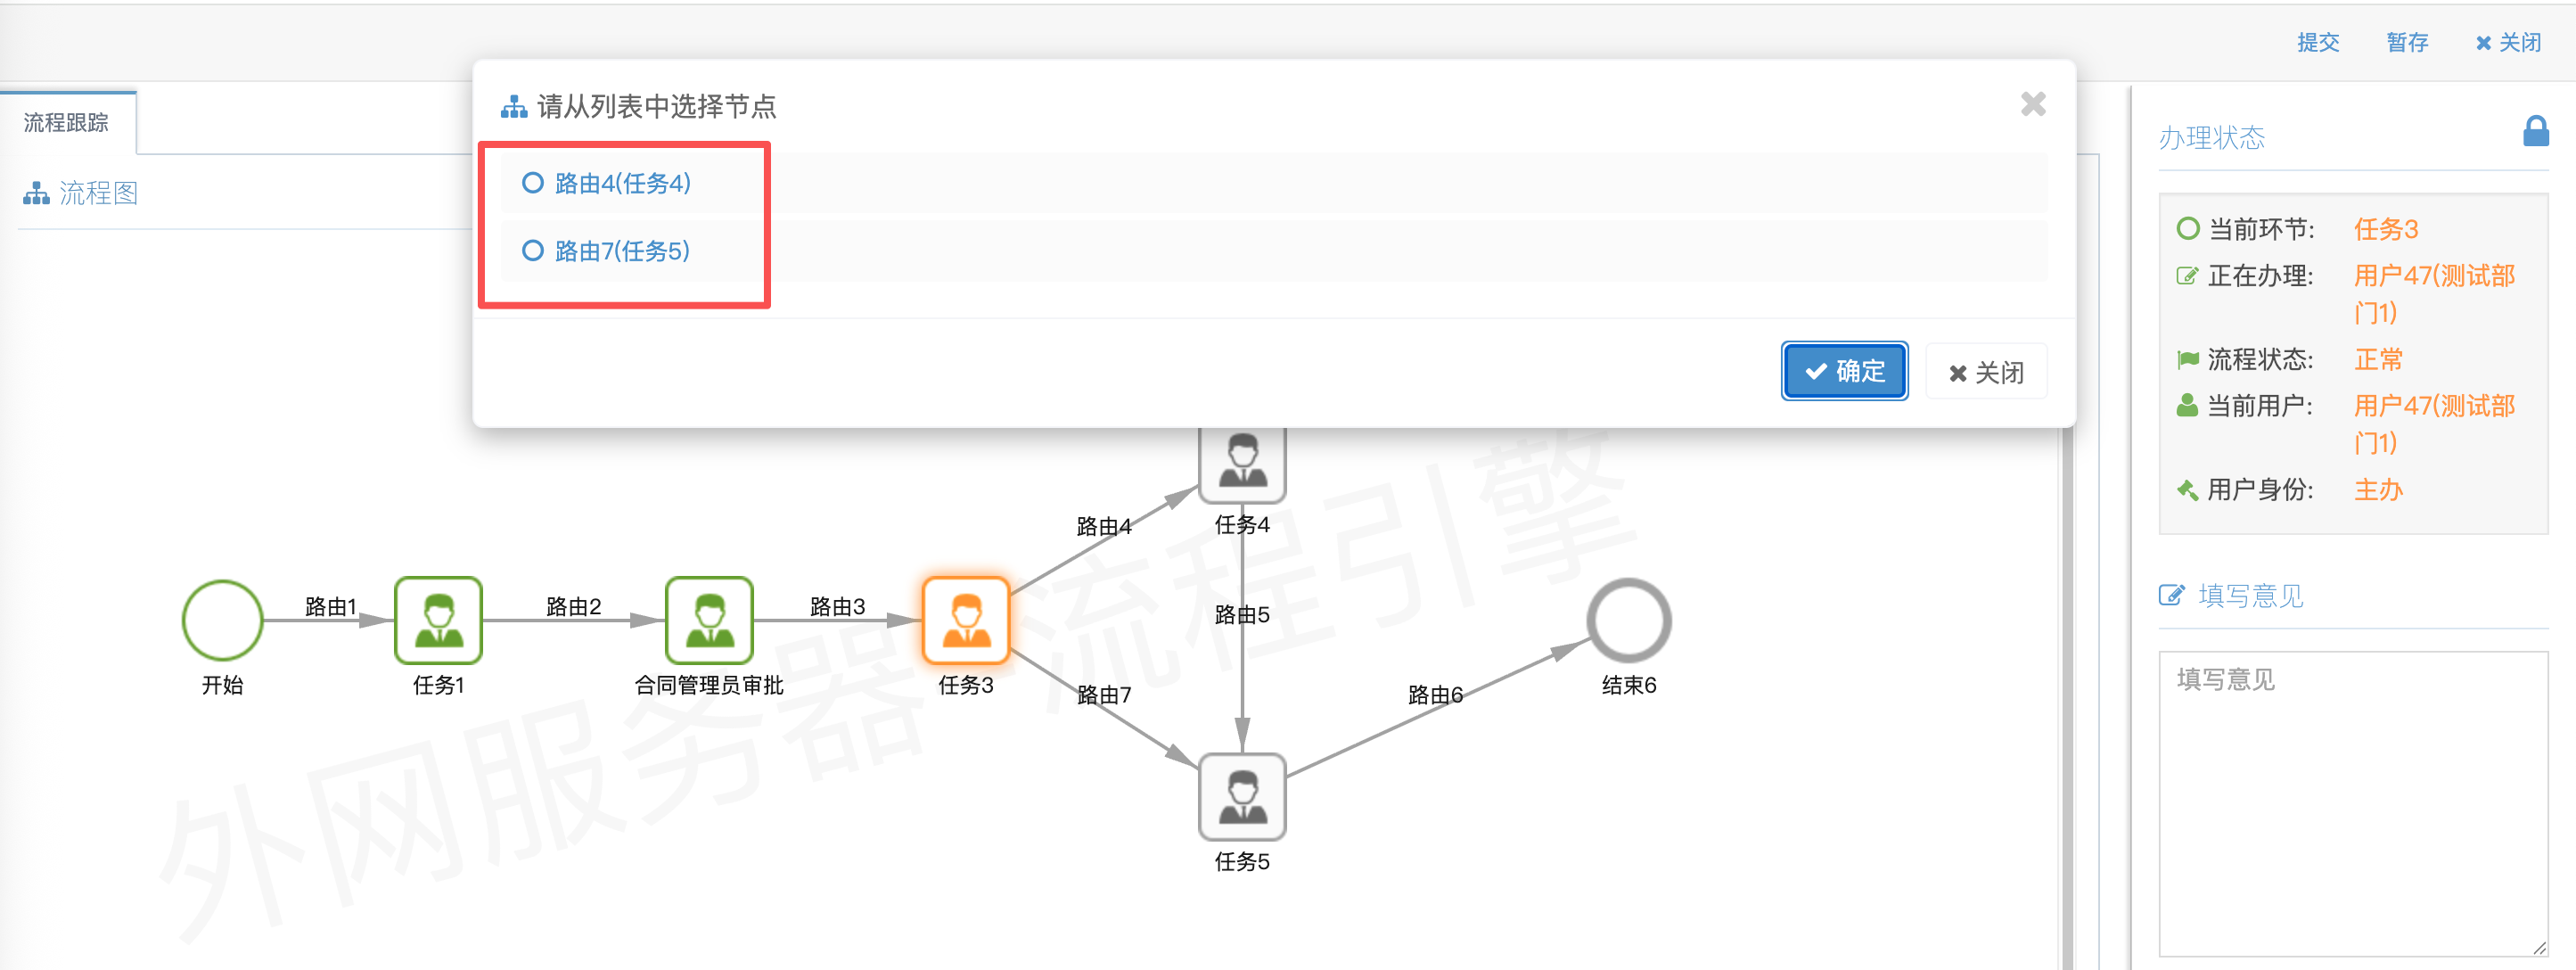
When you need to select the next node: Select the node, set assignees, then click OK
Switch accounts to continue testing:
In the default account list, user 47 corresponds to login user47 with password 1234; other accounts follow the same pattern.
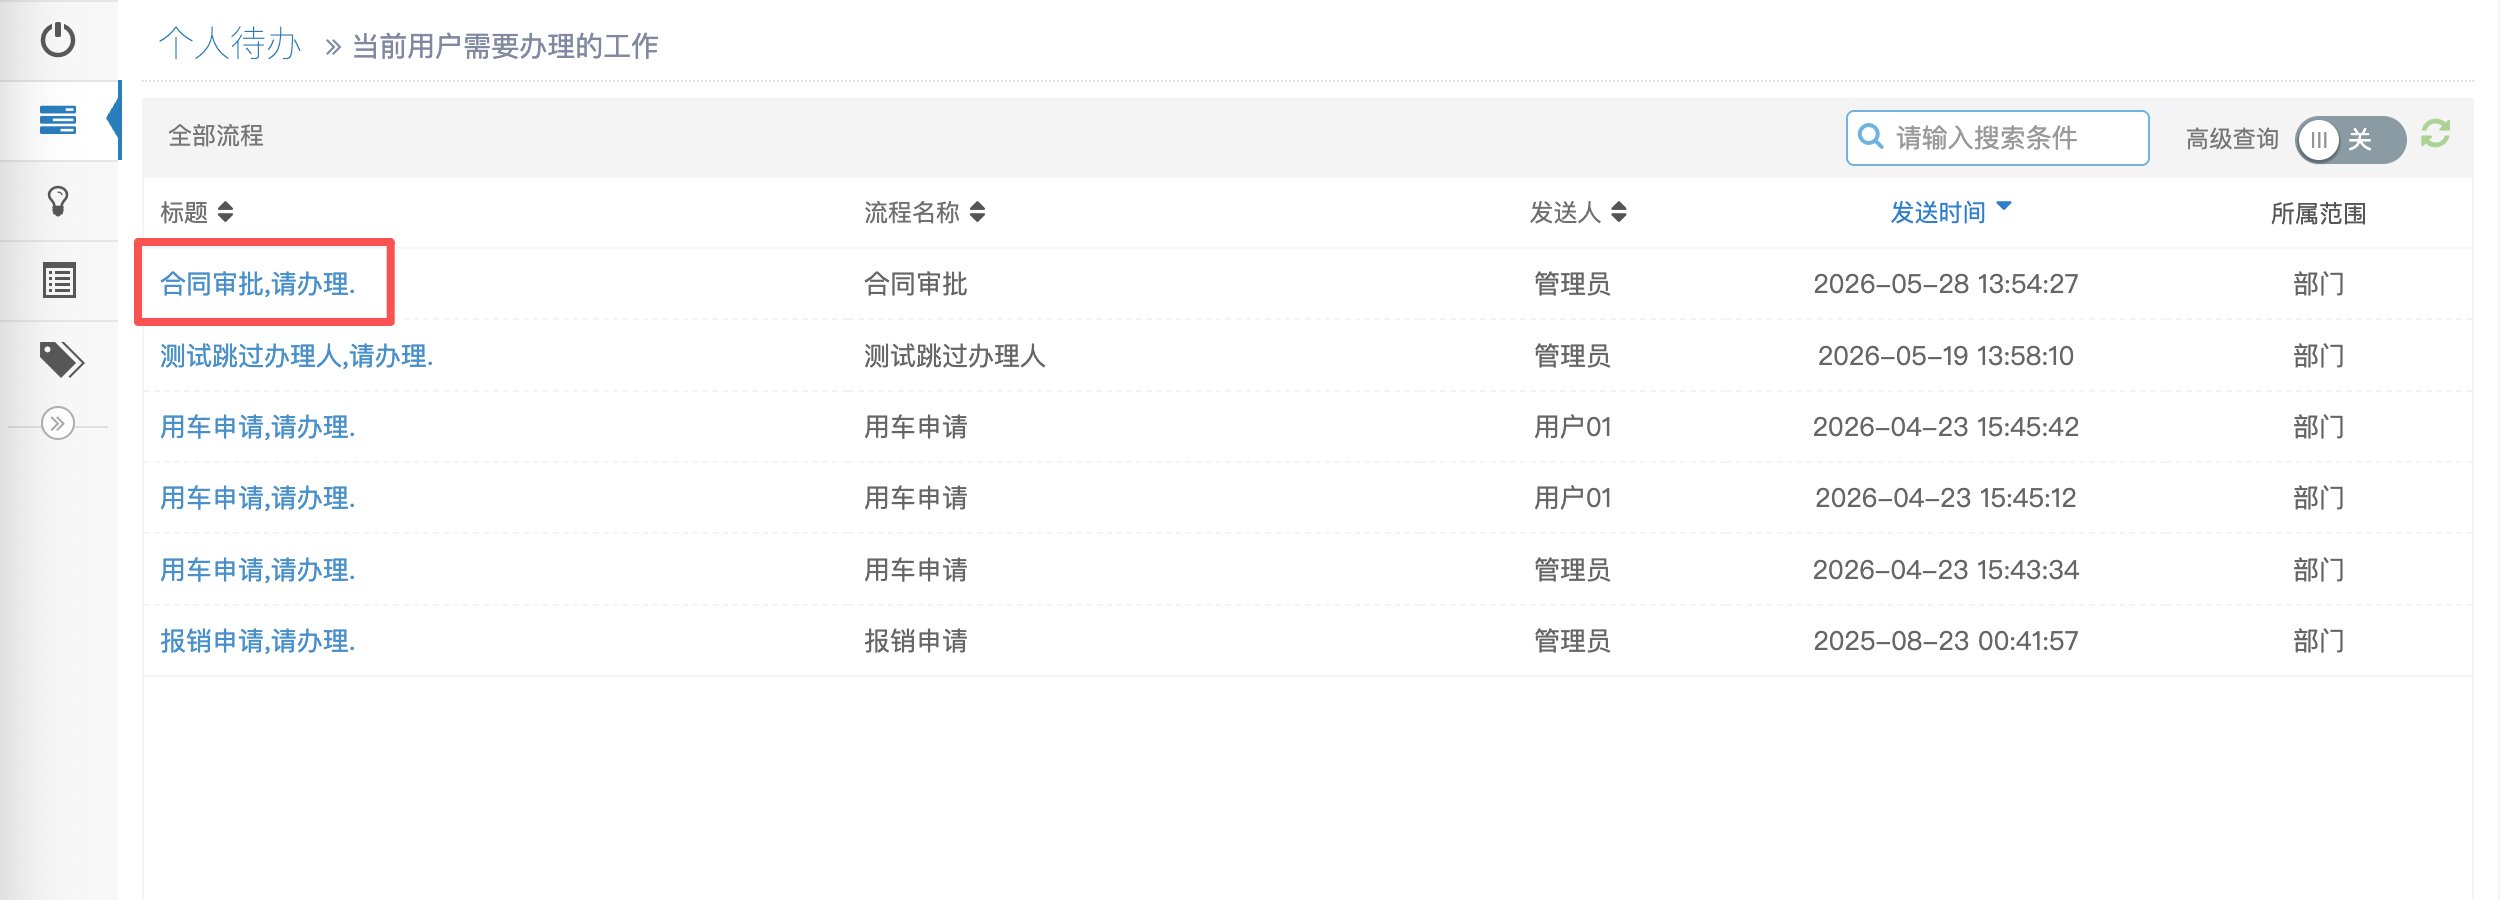
Check pending tasks under Work Center → My Pending Tasks and click a title to view details:
Advanced Features
For more tutorials, see User Guide > Tutorials.
For more feature details, see User Guide > Process Design.
Notes
- Save the process promptly after design; unsaved changes will be lost.