
Standalone Deployment
1 Overview
Example environment used in this document: JDK 1.8, MySQL 5.7
Steps and commands are the same across different operating systems.
Note: The default product package targets JDK versions below 11, so JDK 1.6 or above is required (JDK 1.8 is recommended for versions below 11). If you need JDK 17, request a separate JDK 17 product package.
2 Database Preparation
For MySQL, database configuration is case-insensitive.
Create a new database using a database tool. It will be used for initialization later. Use UTF-8 character set.
Note: The product JAR package includes drivers for MySQL 5, Oracle, and Dameng by default.
For MySQL 8 or other databases, add the database driver separately. See JAR Deployment: How to Replace Database Driver Files
3 Start the Service
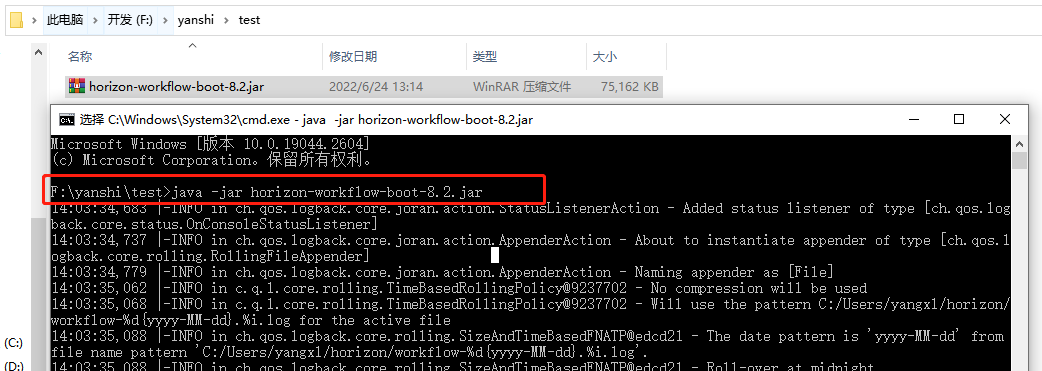
Copy the JAR package to the installation directory (the path must not contain Chinese characters). Open a command prompt and navigate to the installation directory.
Run: java -jar {jar-file-name} (adjust the file name as needed).
After running the command, the embedded Tomcat server starts automatically — you do not need to install Tomcat separately.
Example: java -jar horizon-workflow-boot-8.2.jar
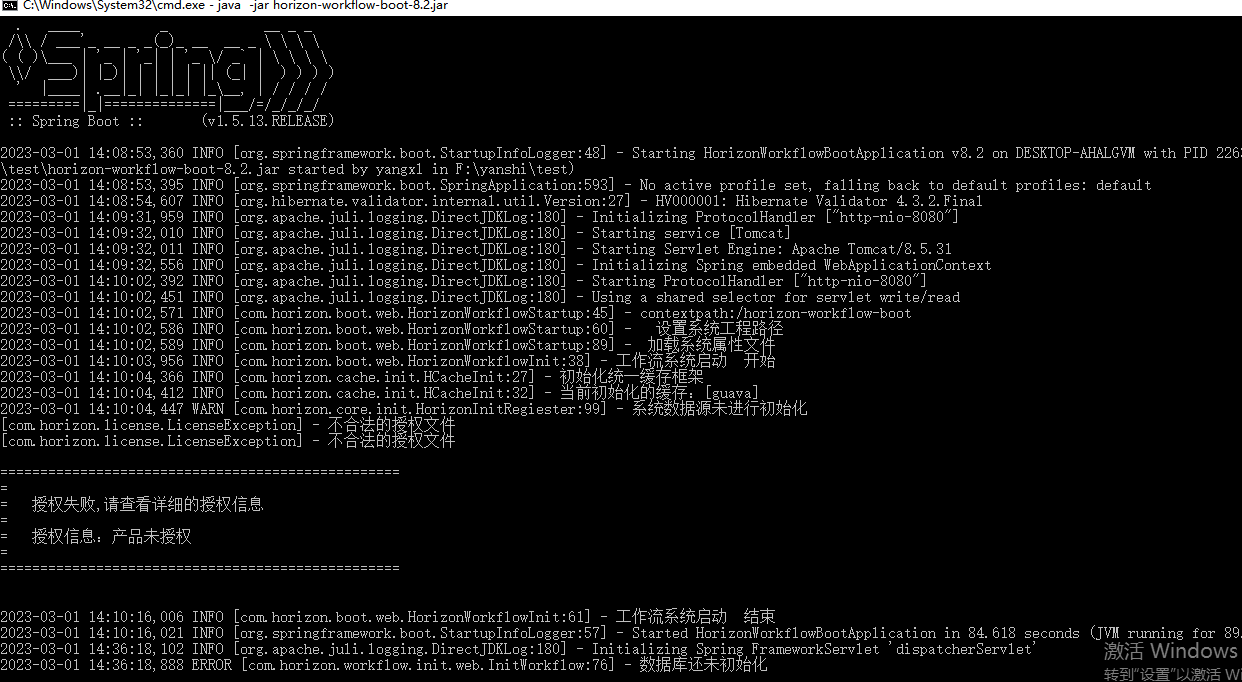
When the following output appears, the service has started successfully.
4 Access the Service
After a successful start, open the workflow in a browser using the IP address or localhost.
Example URL: http://localhost:8080/horizon-workflow-boot
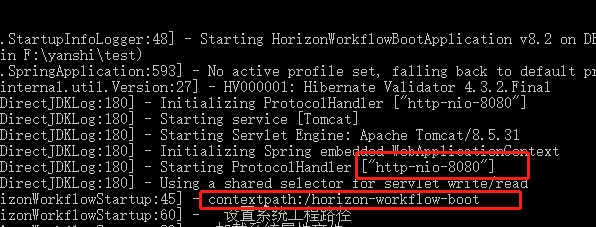
Default port in the product configuration: 8080
Context path: horizon-workflow-boot
You can also find the port and context path in the backend logs:
After a successful visit, the following page appears:
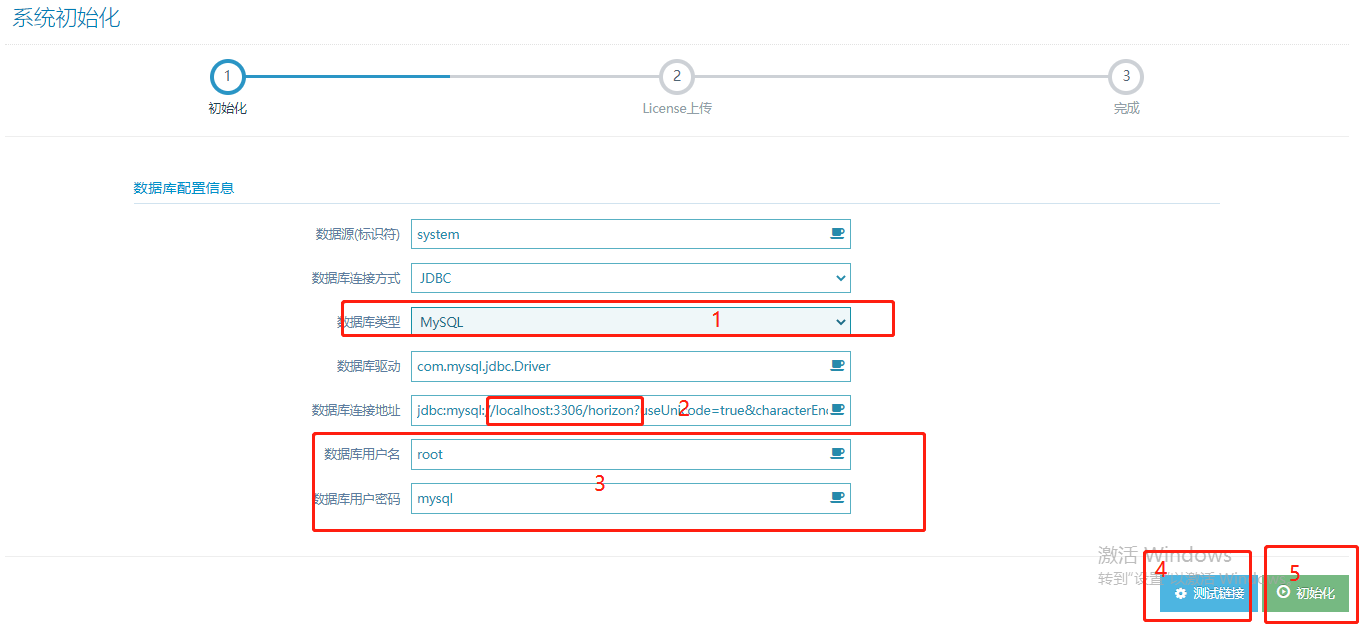
- Select database type: MySQL
- Update the IP, port, and database name in the connection URL.
- Update the database username and password.
- After filling in the information, click Test Connection.
If the test fails, verify the following and check backend logs:
- Network connectivity between the application server and database server; whether the application server can reach the MySQL port
- Database connection details, database name, and password
- Driver version
- After the test succeeds, click Initialize and wait for the success message.
If errors occur, see Common Deployment Errors (Database Connection Test Failed, Initialization Failed)
5 Upload License
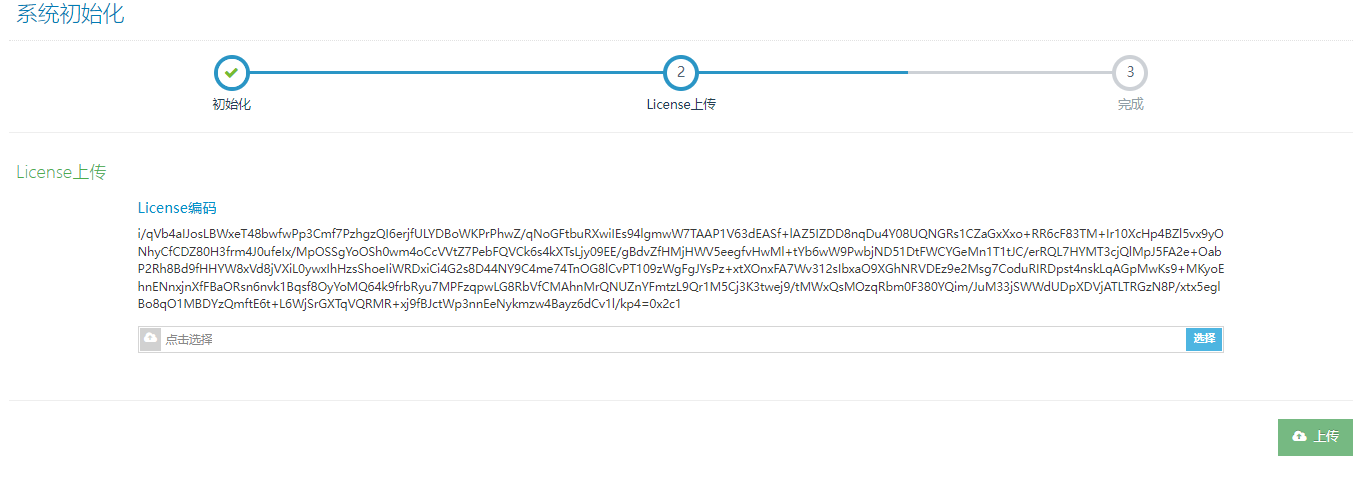
After initialization succeeds, the system redirects to the License upload page and displays a License code. Send this code to your software vendor.
After receiving the License file, click Upload to complete the License upload.
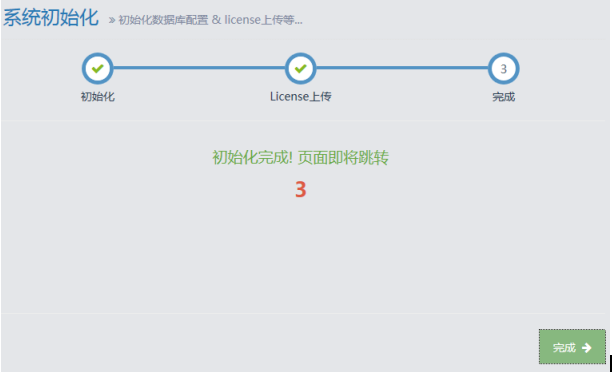
After upload, the system prompts you to finish. Click Finish or wait 3 seconds for automatic close.
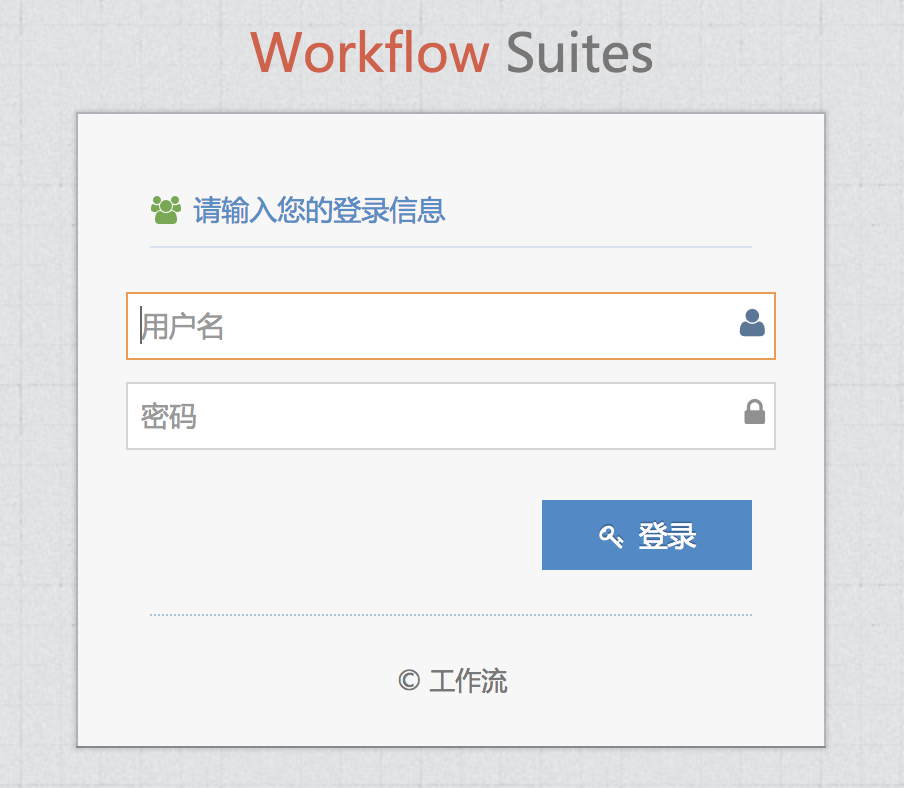
After the License is uploaded and verified, the system redirects to the login page.
Notes:
- If the generated License file does not match the product parameters, you will remain on the License upload page.
- If the login page does not appear within one minute, check backend error logs.
6 Log In to the Workflow
Username: admin
Password: 1234
7 Database Configuration File Description
After the JAR starts, configuration files are generated on the server's disk.
They are not regenerated on subsequent starts unless you delete the existing configuration files before each start.
Default configuration file location after deployment:
- Windows:
C:\Users\{current user}\workflow/properties - Linux:
/Use/{current user}/workflow/properties
Configuration path modification rule:
BOOT-INF\classes\workflow-conf\properties\horizon.properties
If horizon.name has a value, that path is used as the configuration file location and a workflow folder is created automatically.
If empty, the default location is used — the current OS user's home directory.
If you modify configuration files, update them back into the JAR package.
Important:
- License files are also generated in this directory.
- Database connection information from the initialization page is written here; you can copy the content back into the JAR package.
- Even if files on disk are deleted or the configuration path is changed, you do not need to reconfigure the database connection.
8 How to Modify Database Configuration
Database Configuration File Description
Based on Section 7, the database configuration file is generated on disk.
If properties\dbconfig.properties exists under the path specified by horizon.name in horizon.properties, it will not be regenerated.
In dbconfig.properties, horizon.identifier= is the flag used at startup to determine whether the database has been initialized.
- If it has a value: the system considers the database initialized and starts using the configured database (default: system).
- If empty:
- The system considers the database not initialized.
- After startup, visit http://localhost:8080/horizon-workflow-boot in the browser.
- You will be redirected to the database initialization page.
Two Ways to Re-initialize
- Clear the value of
horizon.identifier=inworkflow\properties\dbconfig.propertieson disk, then restart. - Delete
workflow\properties\dbconfig.propertieson disk, findBOOT-INF\classes\workflow-conf\properties\dbconfig.propertiesin the JAR, clear the value ofhorizon.identifier=, then restart.
After restart, visiting the page will show the re-initialization screen. Note: Ensure there are no existing workflow tables in the database, or initialization will fail.
Two Ways to Connect to an Existing Database Directly
- Follow the re-initialization steps above to reach the initialization page, but do not initialize. Update the database information and click Test Connection. The database info is written to
dbconfig.properties. Restart the service to connect using the configured database. - Directly edit the database configuration in the generated
dbconfig.propertiesfile.horizon.identifiermust have a value. Restart the service to connect using the configured database.